
Reach The Required Field Through A Small Incision
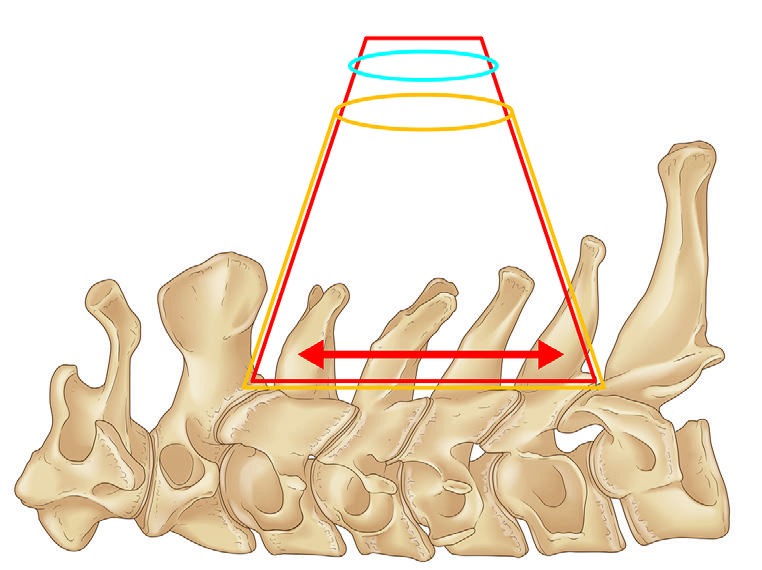
The cranial and caudal deep field is maintained while the required decompression range is checked through a small incision.
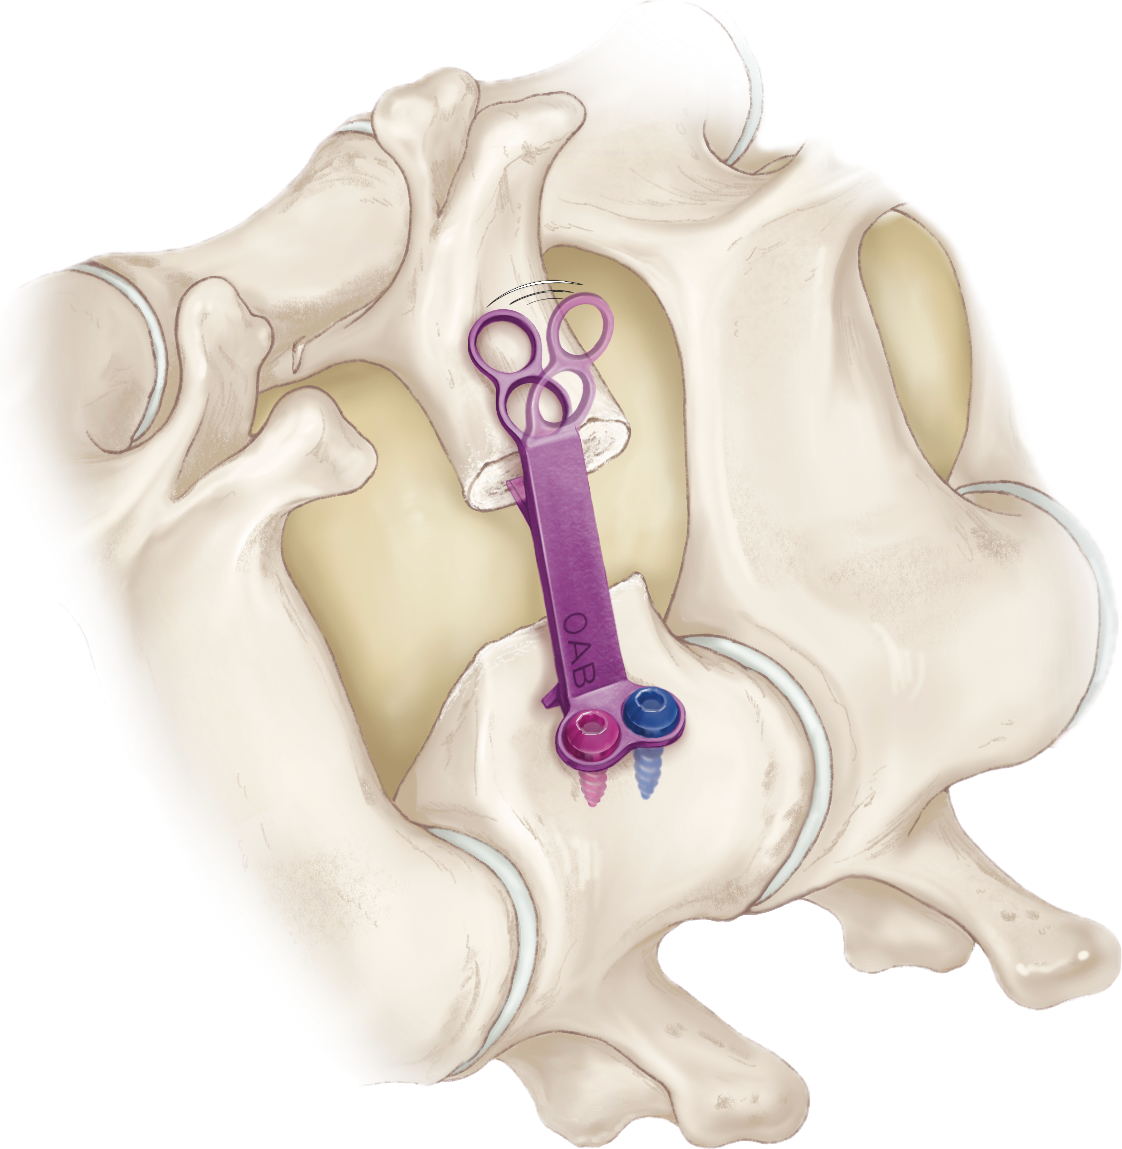 Contourable lamina side
MINIMALLY INVASIVE CERVICAL LAMINOPLASTY
Open-door Plasty for
Early Recovery Approach
An approach focused on preserving posterior tissues. A contourable lamina-side plate. Compact, dedicated instruments.
Technique · System · Clinical literature
Small-incision planning for C3-6 cases
Cervical spondylotic myelopathy and ossification of the posterior longitudinal ligament
Bendable to match laminar morphology
OPERA (Open-door Plasty for Early Recovery Approach) is an approach to minimally invasive open-door cervical laminoplasty. It emphasizes preservation of posterior tissues while reaching the required decompression levels through a small incision.
OPERA Laminoplasty System
OPERA stands for Open-door Plasty for Early Recovery Approach. The plate and dedicated instruments form a compact system for plate holding, hole creation, and screw placement after lamina elevation through a limited small-incision field.
OPERA SYSTEM
Overview
ExLAP follows the standard indication framework for cervical laminoplasty while using preoperative imaging to plan deep anatomy and positioning before reaching the required decompression field through a small incision. OPERA SYSTEM is an option for plate placement after lamina elevation within this limited field.
The cranial and caudal deep field is maintained while the required decompression range is checked through a small incision.
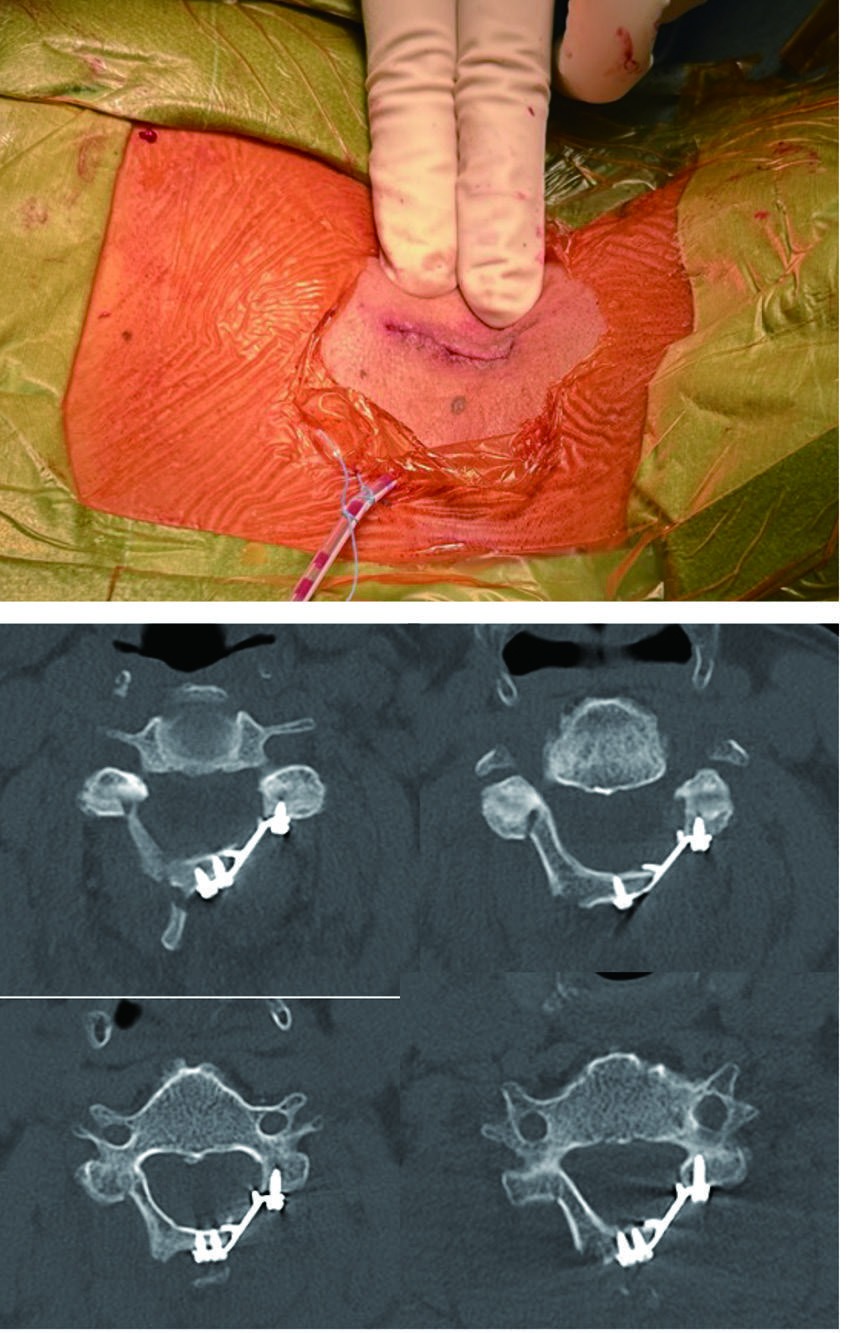
The standard indication framework for cervical laminoplasty is used, with alignment reviewed on a preoperative lateral radiograph. A 30-35 mm incision is considered for C3-6, with C2 or C7 domeplasty according to the extent of stenosis.
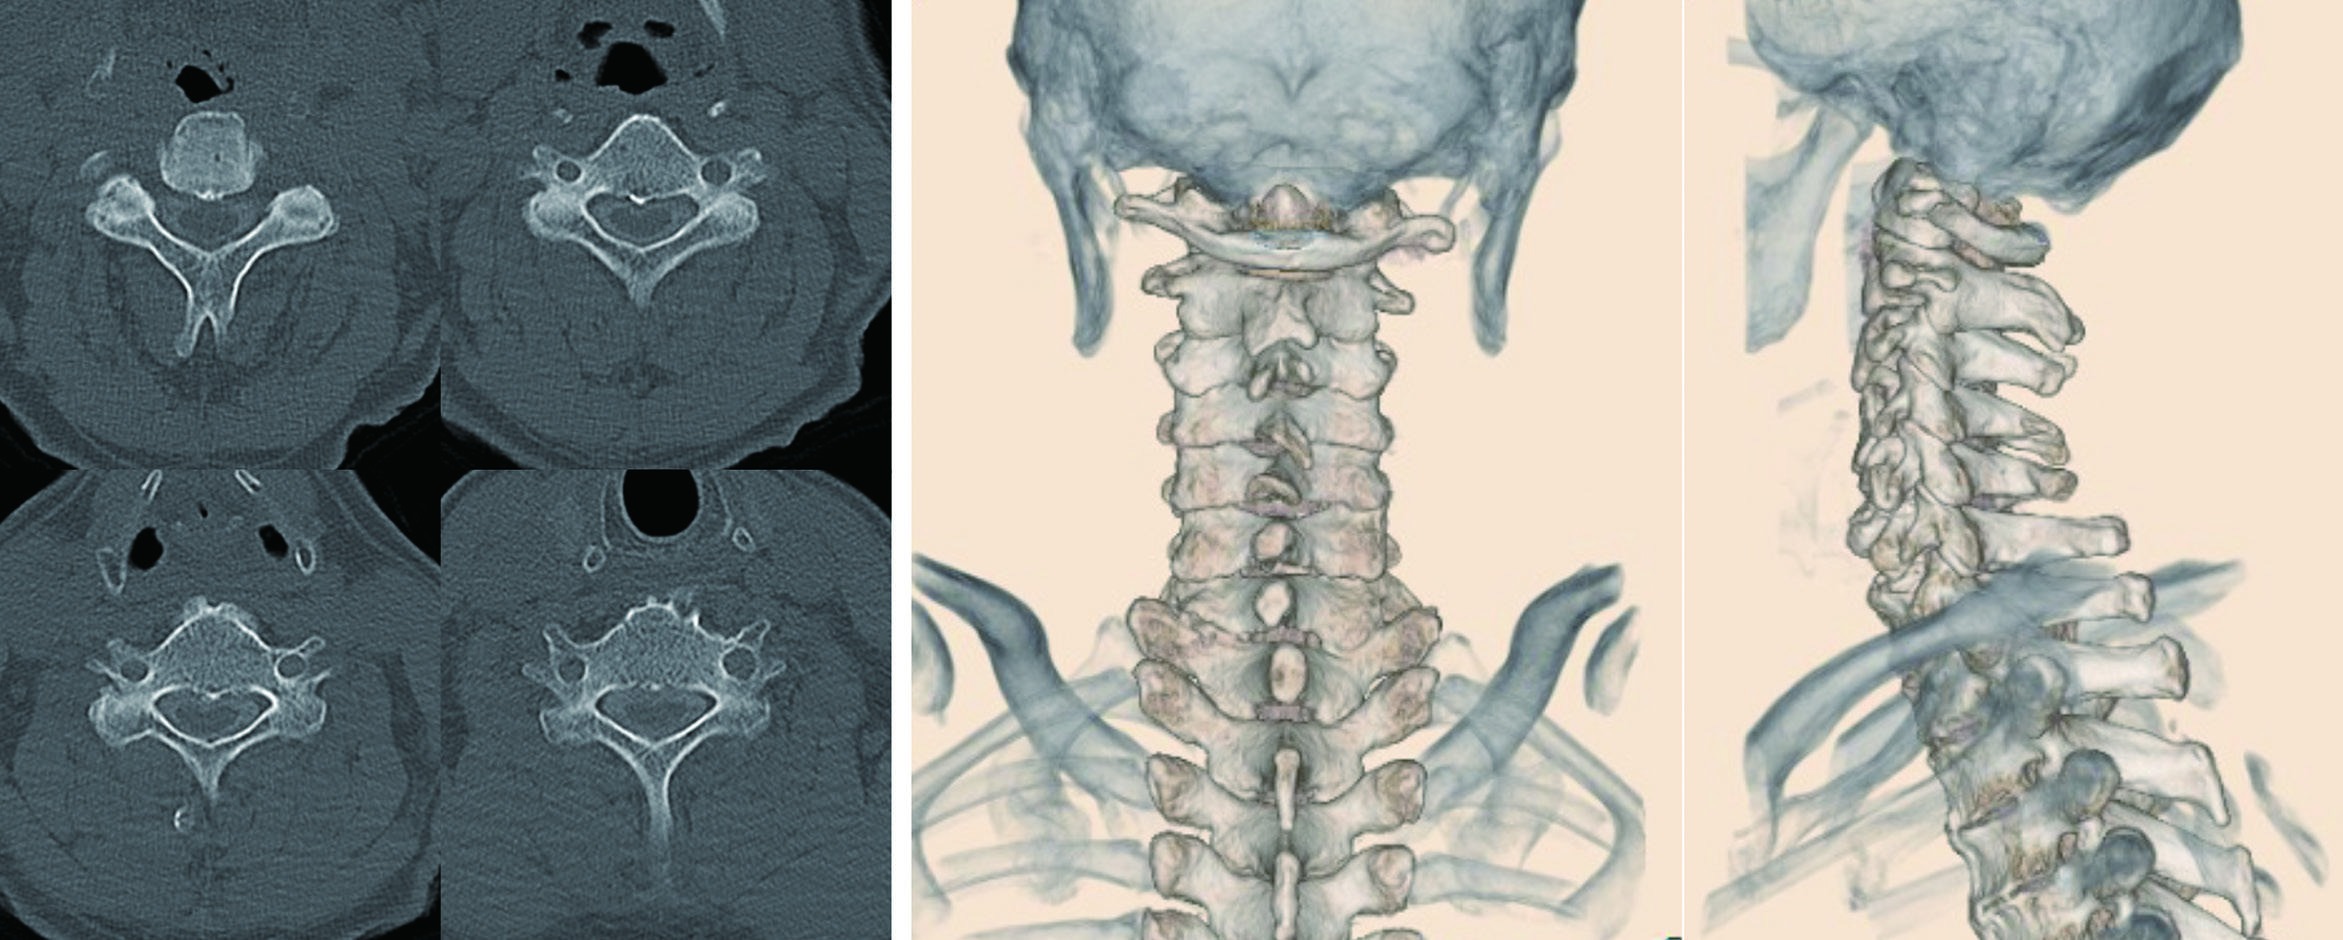
Because the entire field is difficult to see directly through a small incision, preoperative CT is used to understand laminar thickness, while 3D CT helps confirm spinous-process shape and facet osteophytes before splitting, gutter creation, and lamina elevation.
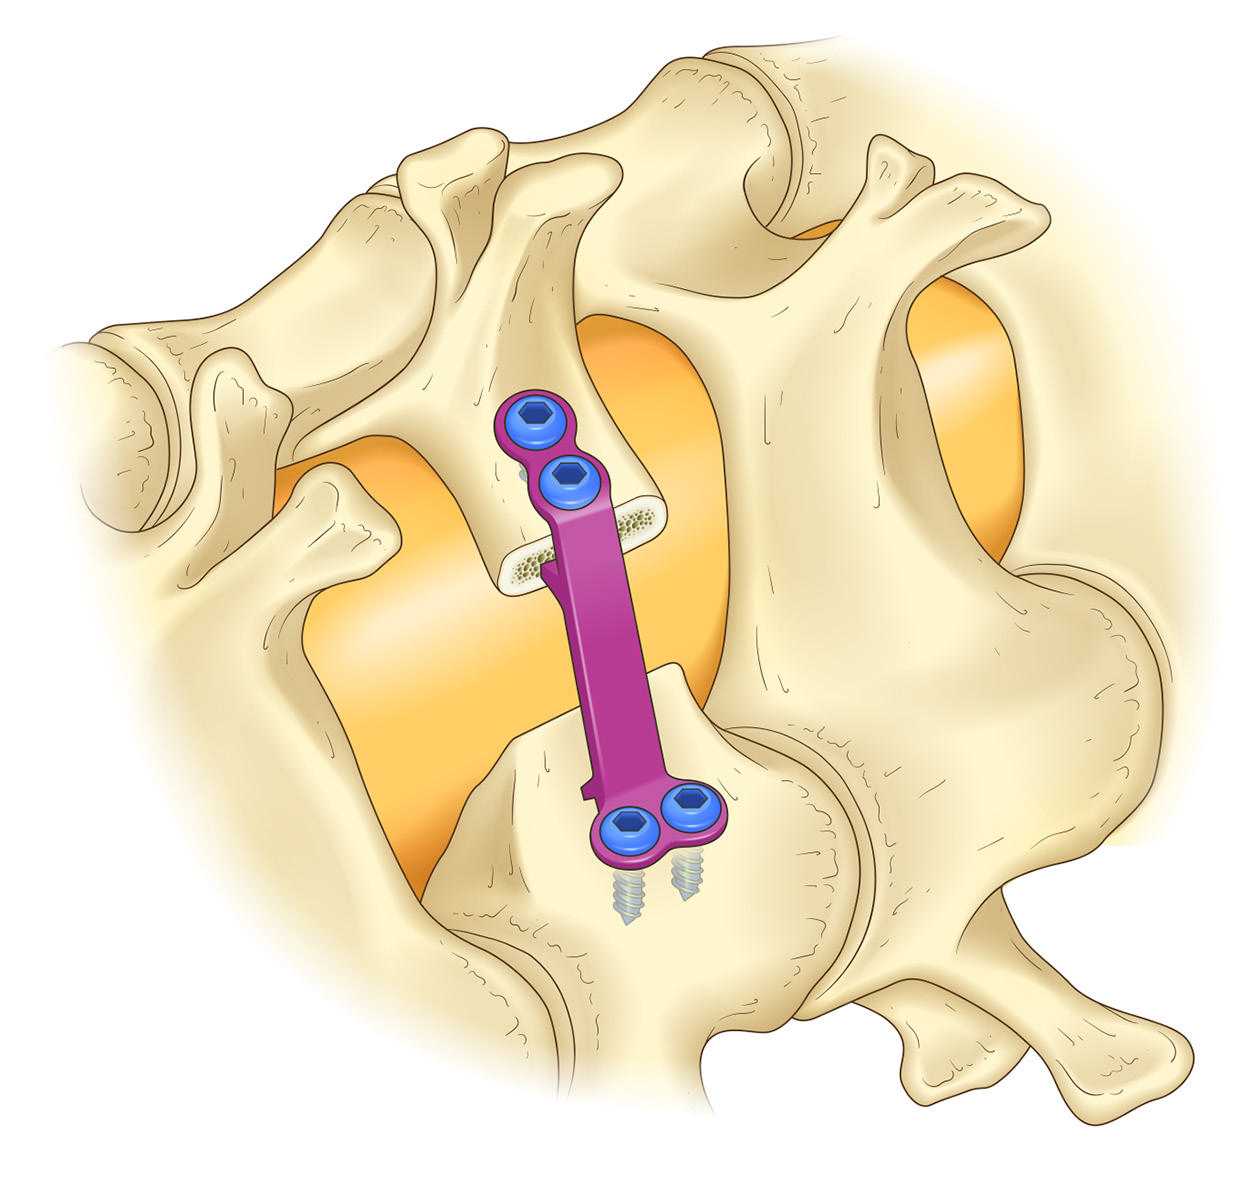
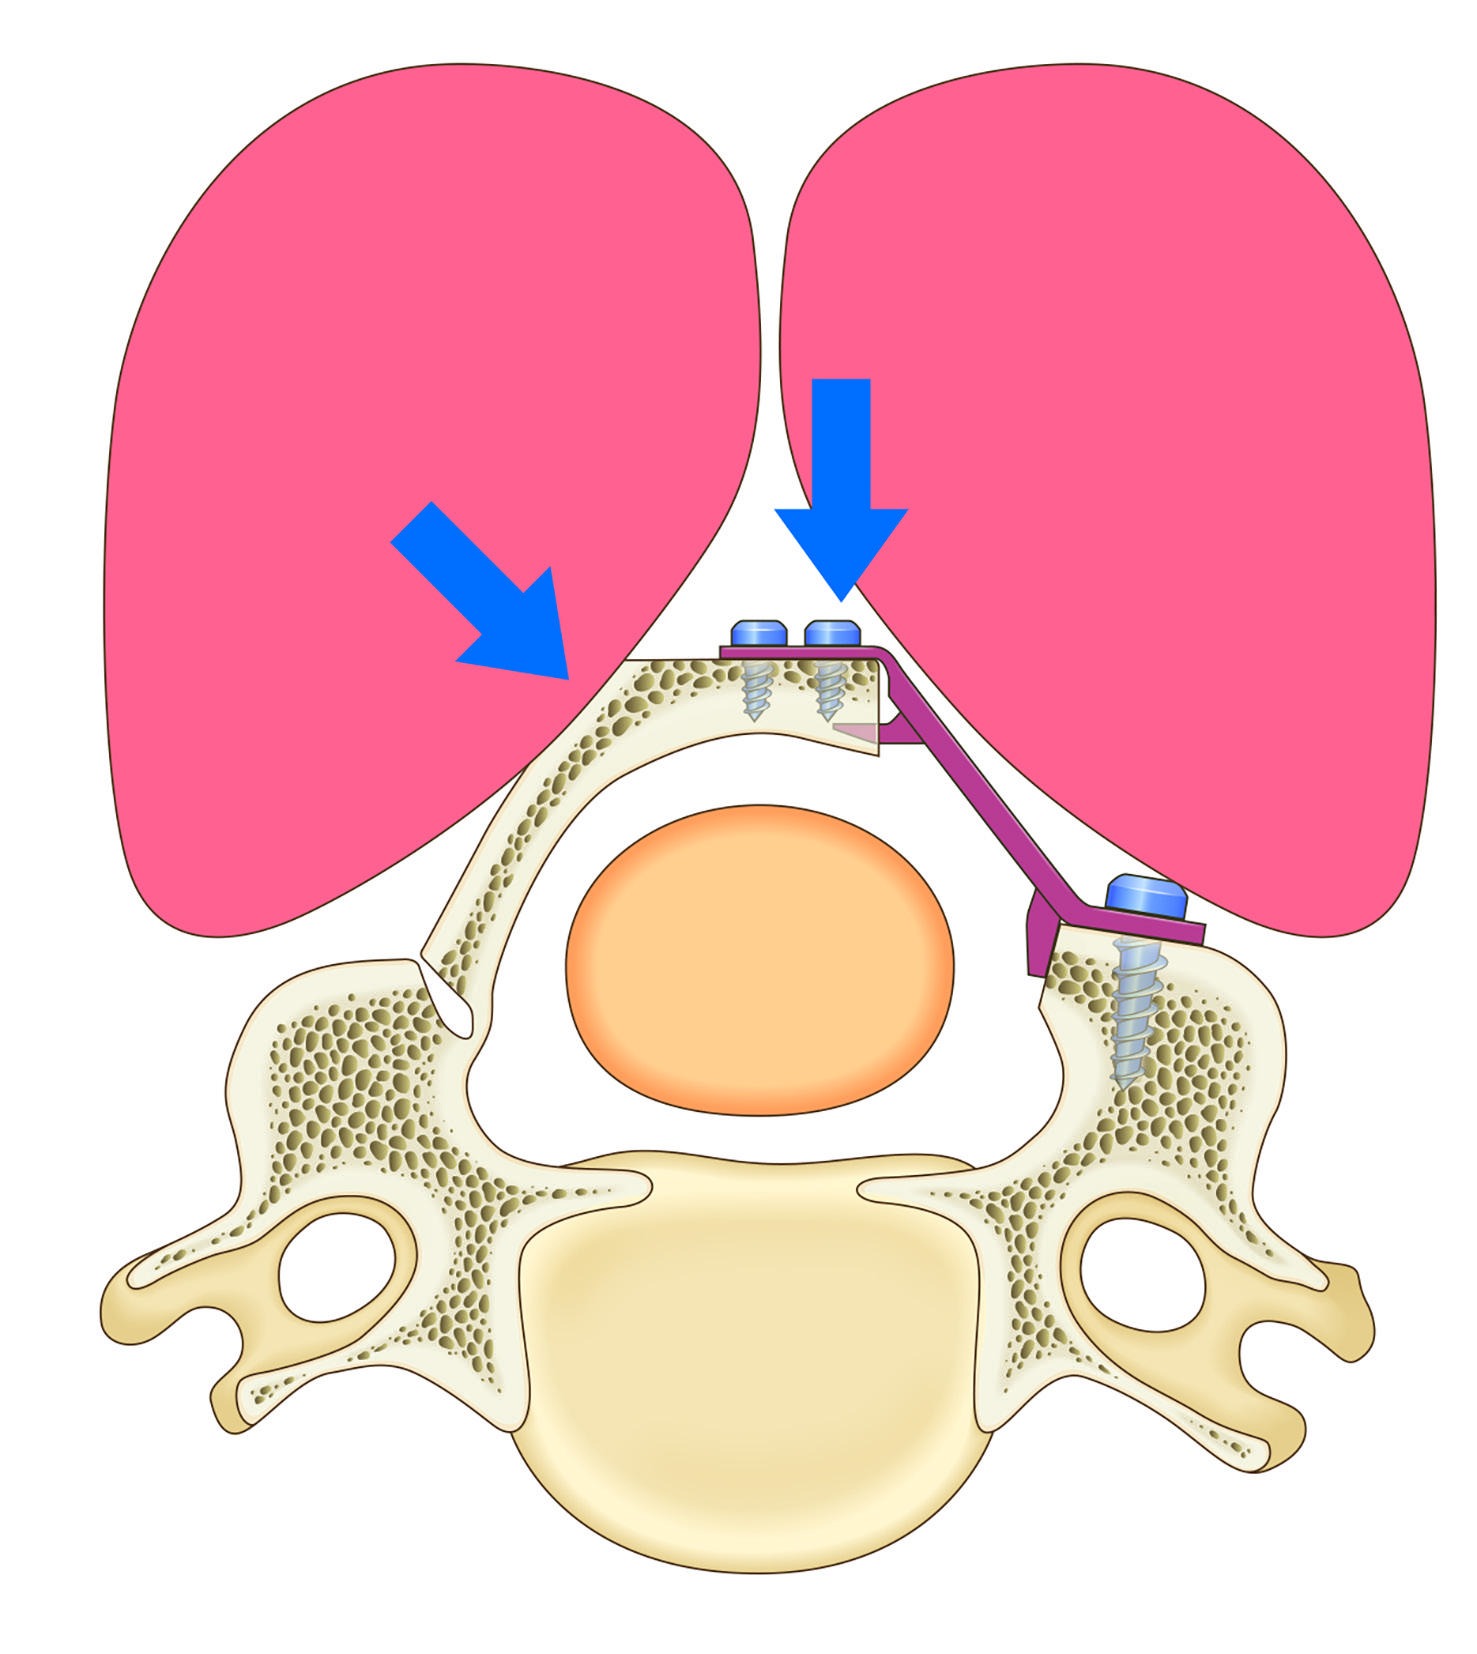
OPERA SYSTEM is a compact plate system for small-incision handling. The laminar side can be bent to confirm fit with bone morphology and anatomical variation. After screw placement on the lateral-mass and laminar sides, the holding state and reclosure force are checked.
Indication and planning
The source explains ExLAP for cervical spondylotic myelopathy and cervical OPLL under the same indication logic as ordinary cervical laminoplasty. Lateral radiographs are reviewed before surgery, and positioning is adjusted so that straight or kyphotic alignment does not become excessively flexed. In small-incision surgery, preoperative planning and positioning strongly influence the accessible field.
Preoperative CT is used to estimate laminar thickness and the required depth of the gutter. 3D CT is used to confirm spinous-process morphology, facet osteophytes, and the cranio-caudal direction of exposure, compensating for the limited orientation available through a small incision.
The surgeon stands on the patient's left side and palpates the C2 and C7 spinous processes. In many cases, the incision is placed from the C3 spinous process toward the caudal side for about two fingerbreadths, followed by accurate midline entry through the nuchal ligament.
The elevated lamina is lifted with a curved curette, and the OPERA plate is used according to laminar morphology. If elevation is stiff, the hinge-side gutter is deepened rather than forcing the opening. Because soft tissues are preserved, the holding state must be checked carefully.
Surgical technique
The minimally invasive operative sequence is presented step by step.
Cervical alignment is checked on a preoperative lateral radiograph. The head is held with a Mayfield skull clamp from neutral to mild flexion, and both shoulders are pulled caudally with tape to make level confirmation easier.
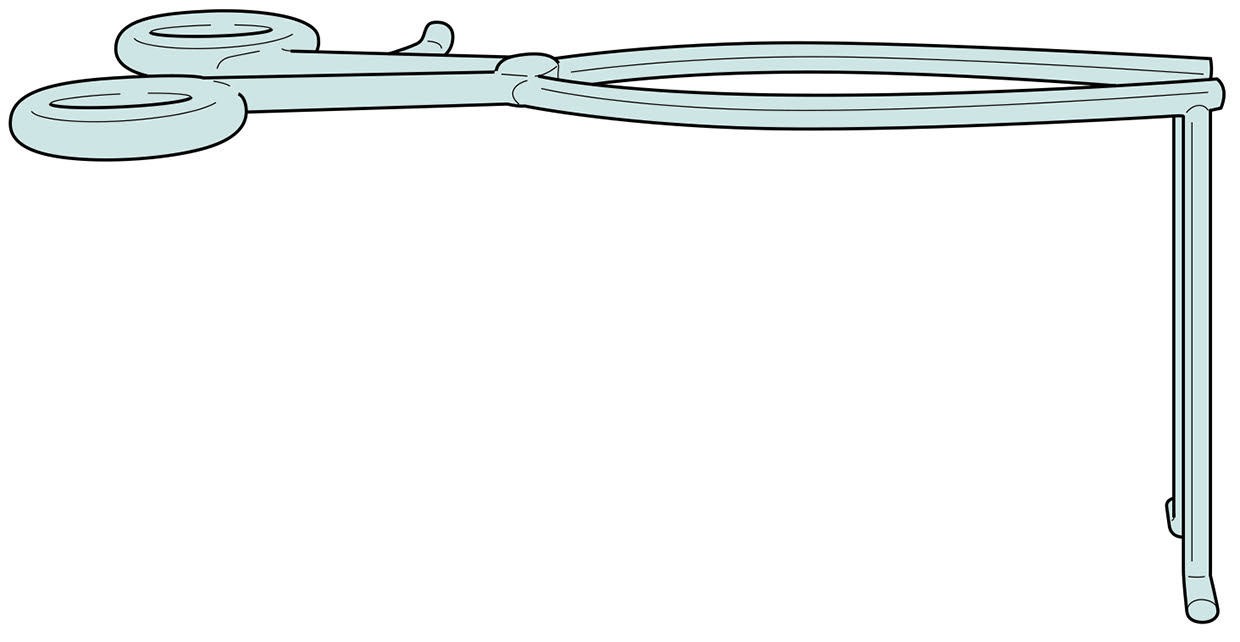
Technique detailsAfter palpating C2 and C7, a roughly two-fingerbreadth incision is designed from the C3 spinous process toward the caudal side. The midline of the nuchal ligament is opened accurately, the C3-6 spinous processes are reached, and the level is confirmed fluoroscopically before the blunt right-angle Gelpi retractor is placed.
Technique detailsThe semispinalis cervicis attachment to C2 is preserved. The lower edge of the C2 lamina and upper edge of the C3 lamina are exposed with a high-speed burr, the C2/3 ligamentum flavum is identified, and detachment or domeplasty is selected depending on the degree of stenosis.
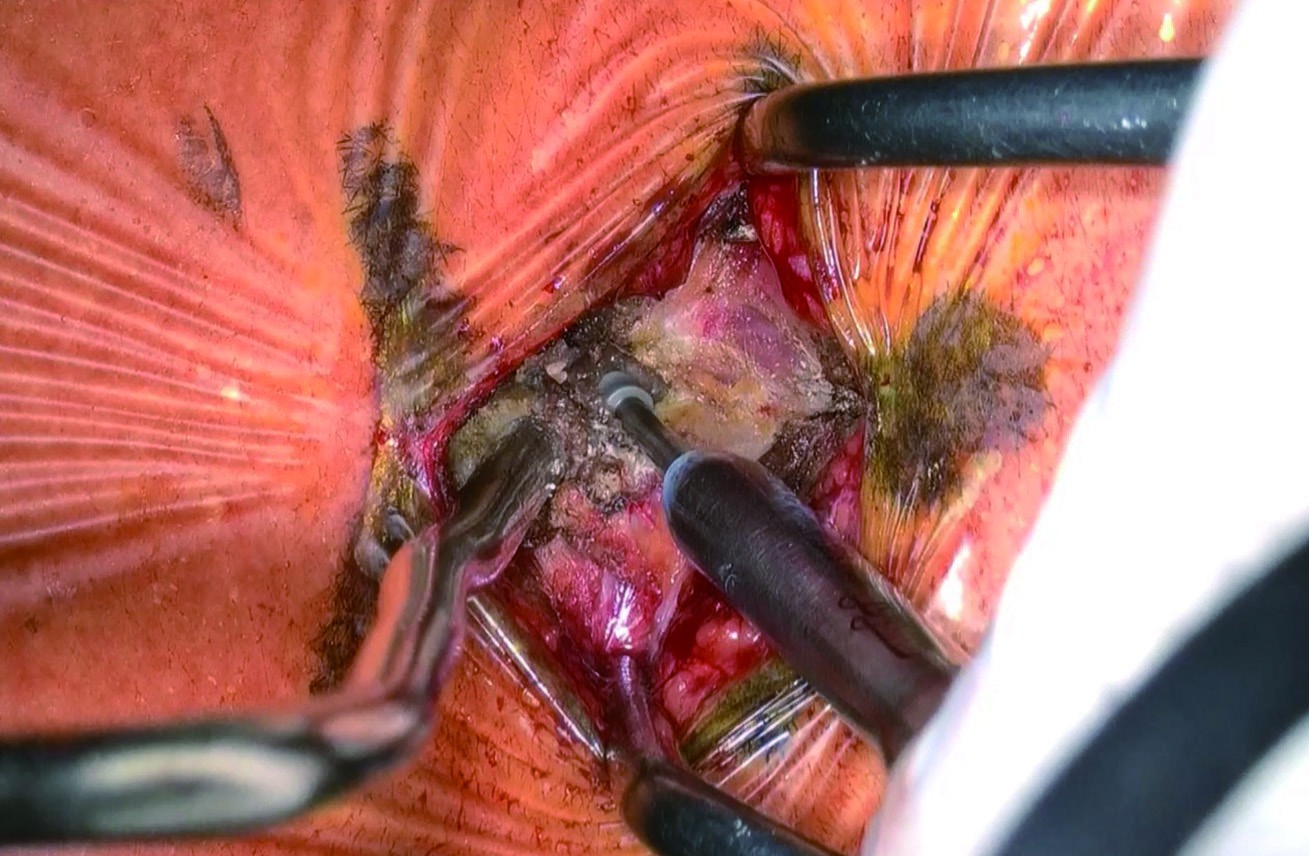
Technique detailsThe gutters of the C3-5 laminae are created with a high-speed burr. In the source, the right side is used as the hinge and the left side as the open side. On the open side, drilling is performed with saline irrigation to reduce thermal injury.
Technique detailsAt C6/7, the surgeon looks down toward the caudal side, and the lower edge of C6 can obstruct the view. A few millimeters of the distal C6 lamina are removed to identify the C6/7 ligamentum flavum, and the attachment is detached from the upper edge of C7.
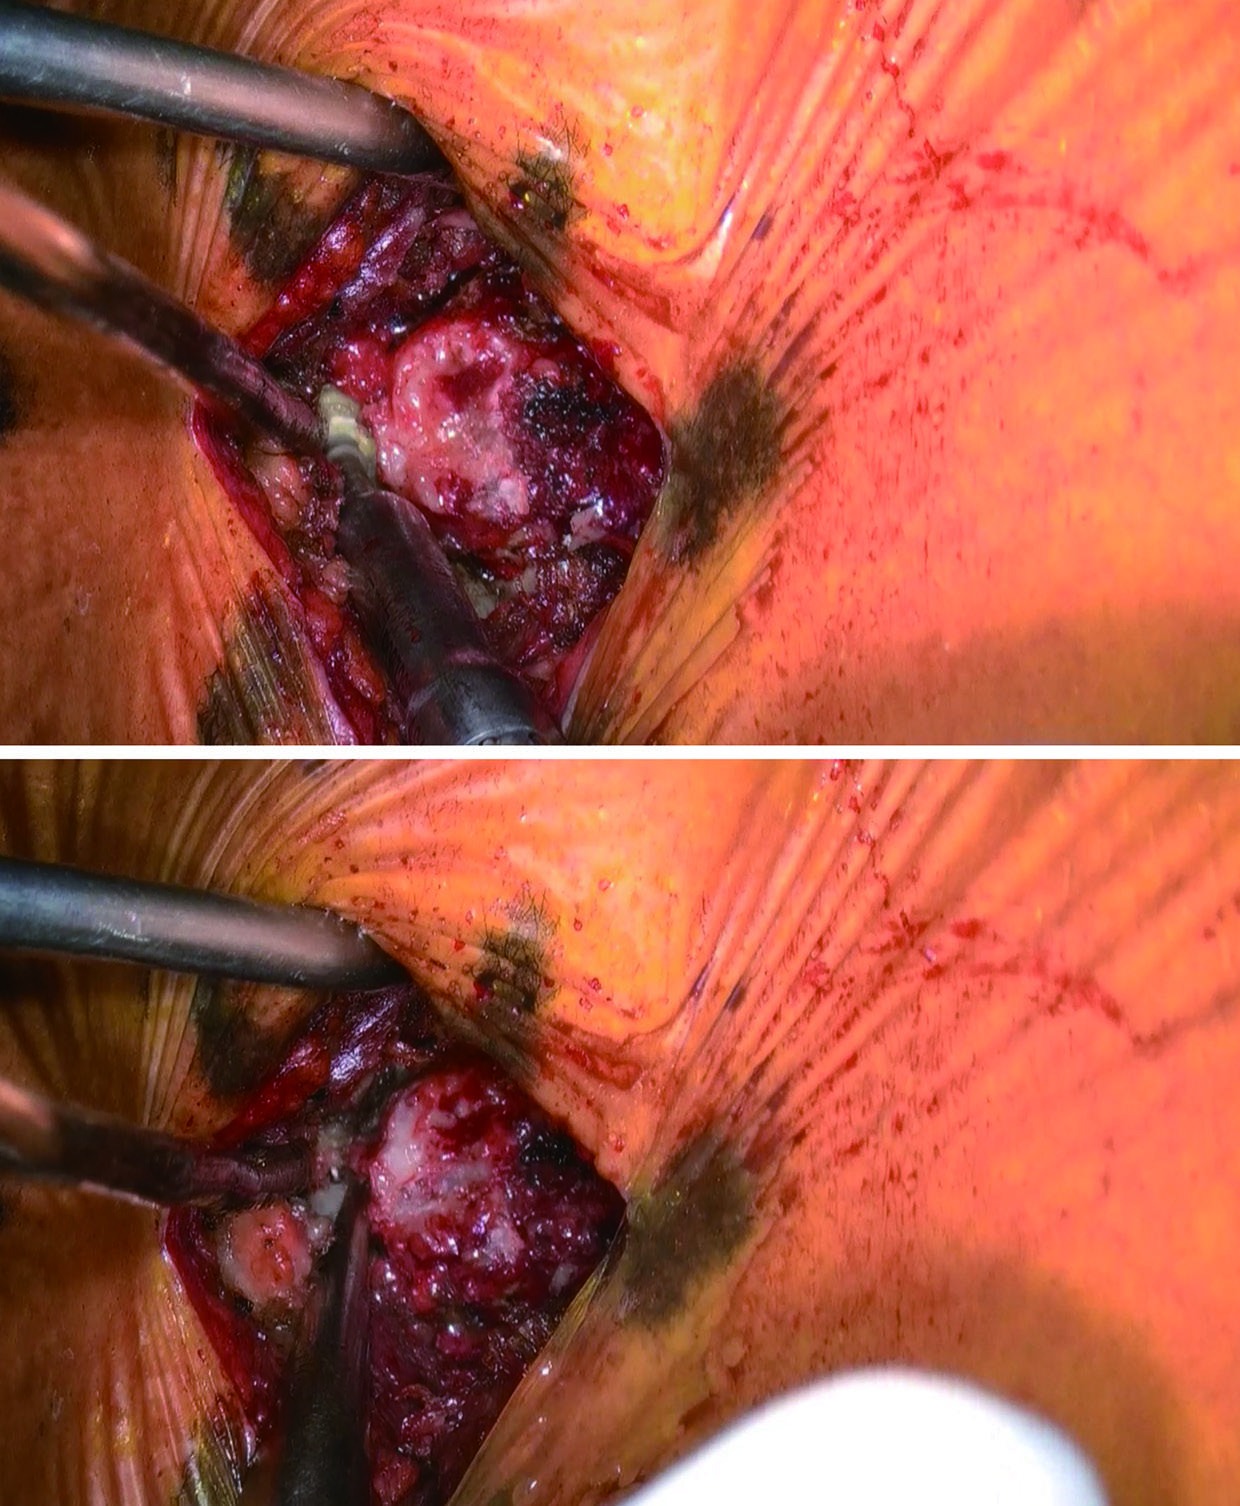
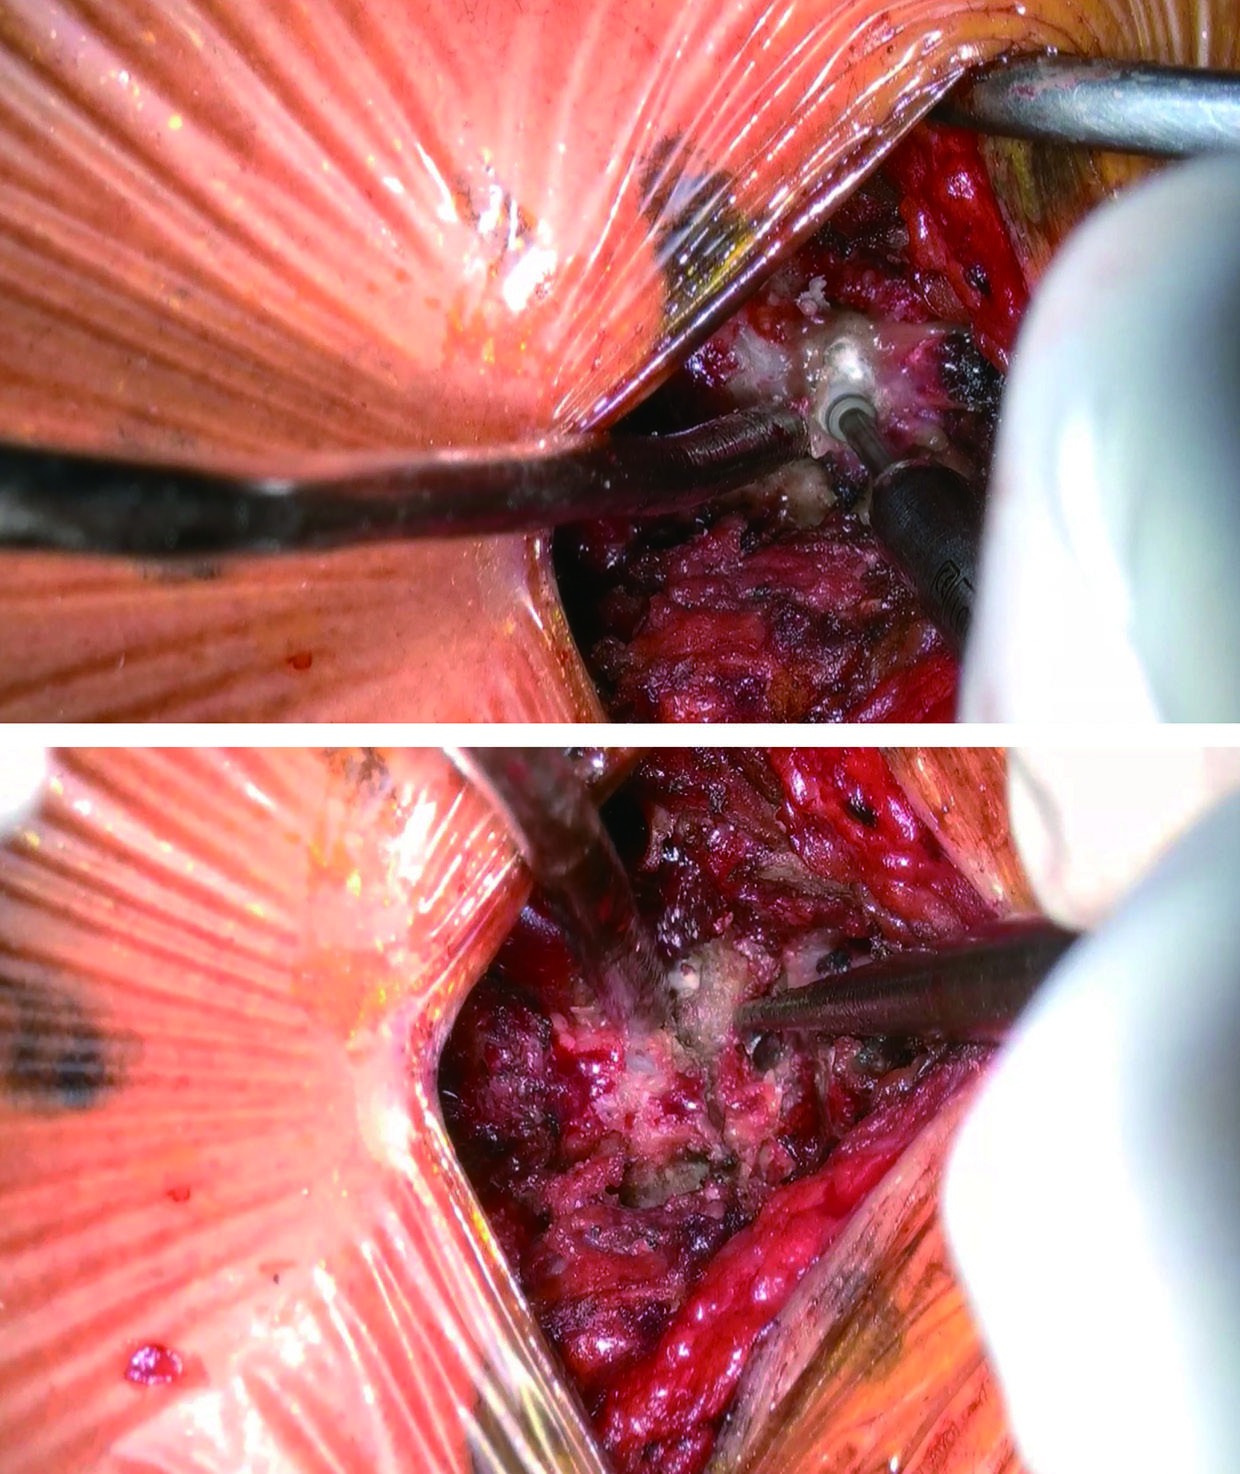
Technique detailsEach lamina is elevated with a curved curette, and the OPERA plate is used to support the opened lamina. Screw holes are created, and screws are inserted on both the lateral-mass side and laminar side. If the lamina is difficult to elevate, the hinge-side gutter is adjusted rather than forcing the opening.
Technique detailsAfter thorough irrigation, a closed suction drain is placed and the muscle layer is sutured. Retraction is maintained so that the cranial and caudal ends can be closed under direct vision, followed by subcutaneous closure and early postoperative mobilization.
Technique detailsProcedure Manual
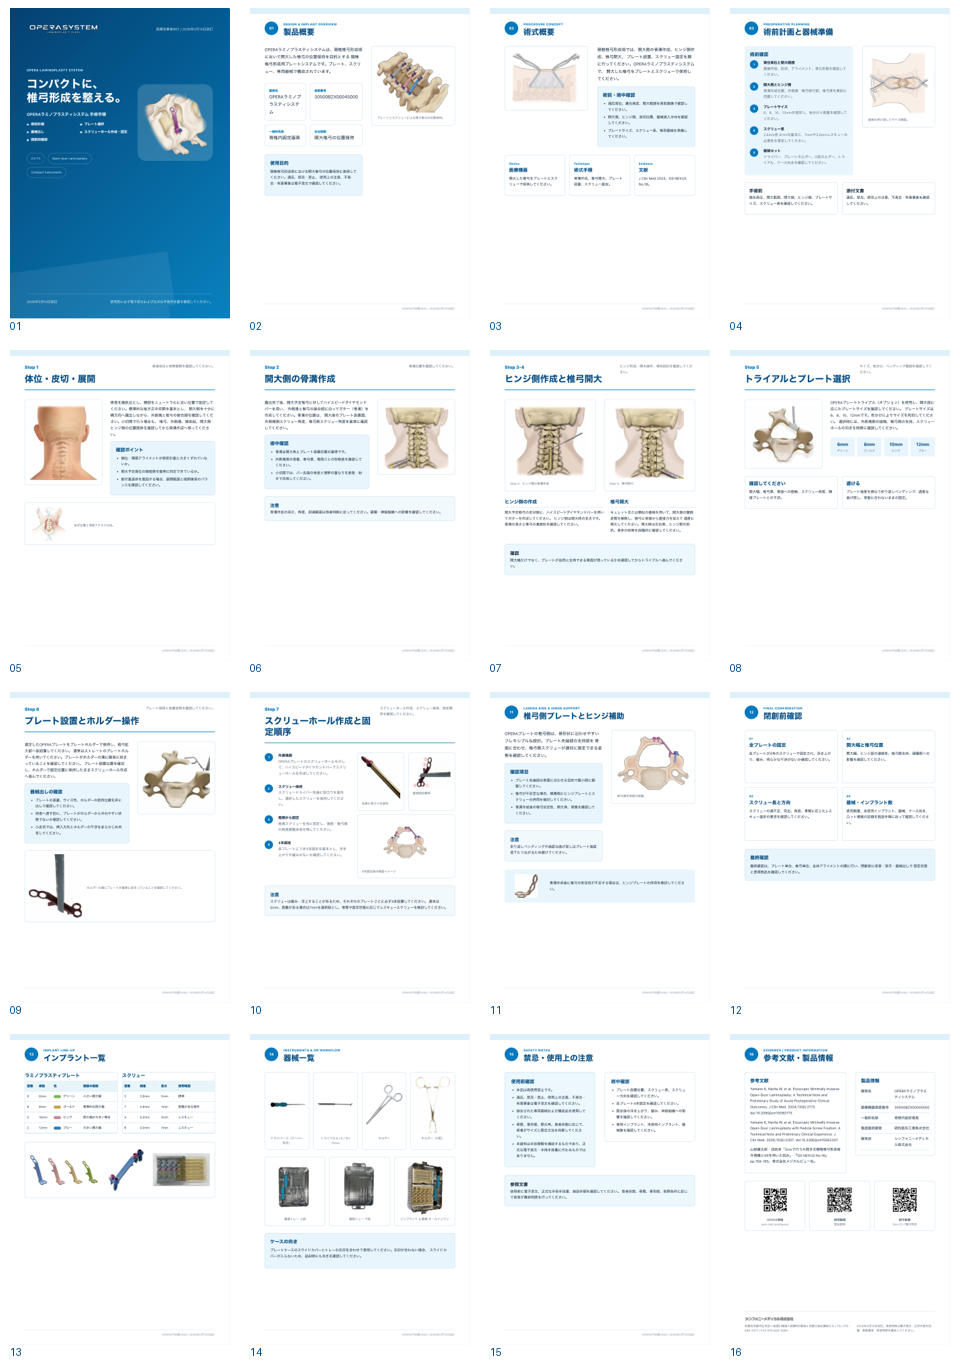
From preoperative planning through final confirmation before closure, the manual organizes OPERA SYSTEM plate selection, holder handling, screw-hole creation, and post-placement checks in operative order.
 ExLAP Fit
ExLAP requires simultaneous attention to the visual field, instrument trajectory, and plate handling through a small incision. The manual makes that workflow reviewable step by step.
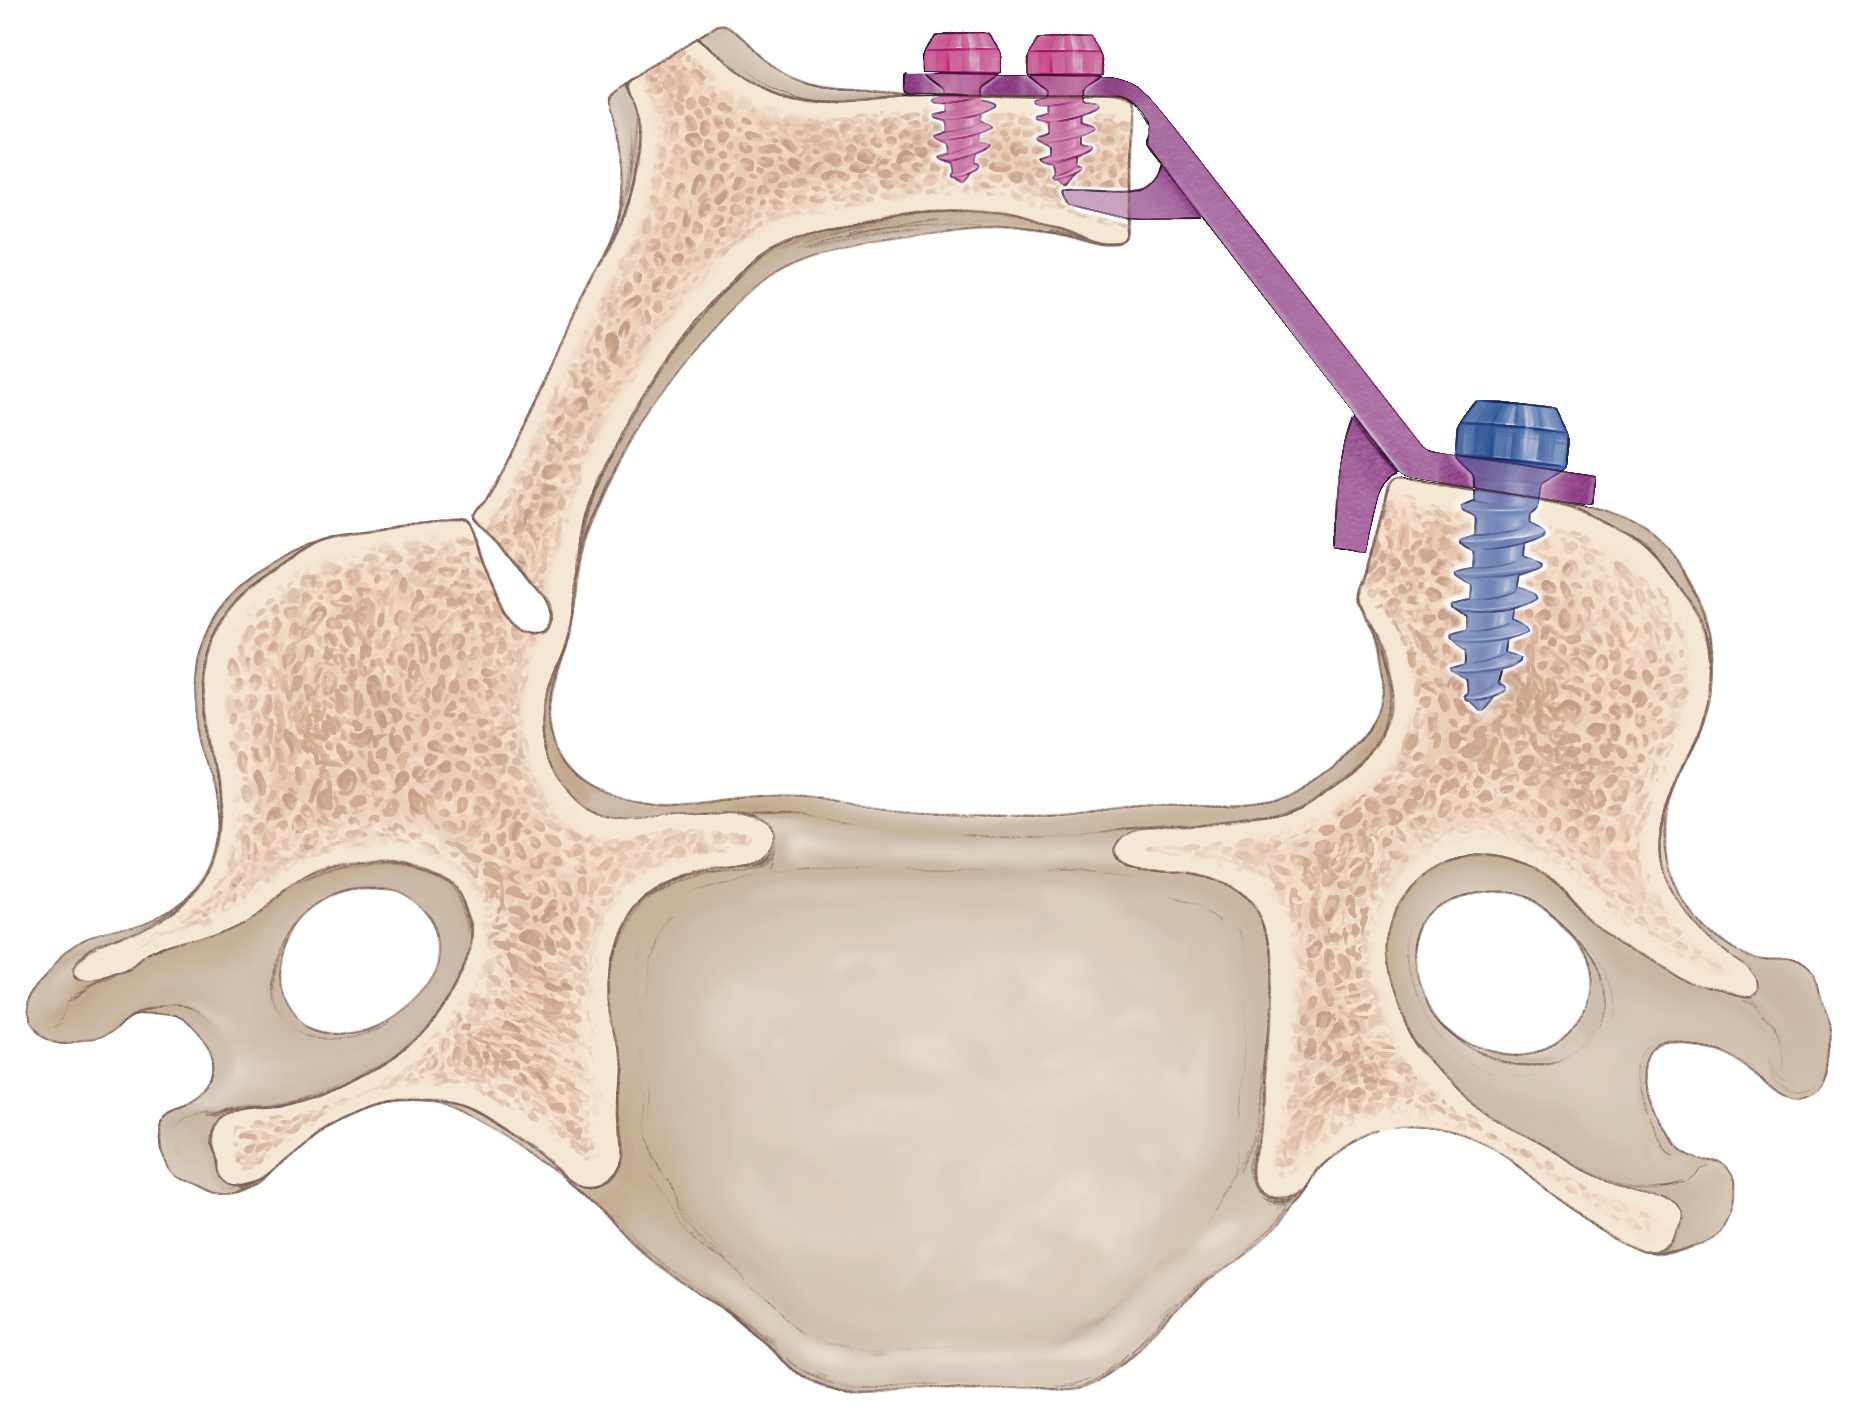 Flexible Lamina Side
The laminar support is presented as a design that can follow the bone surface. The manual emphasizes laminar thickness, opening angle, screw trajectory, and fit according to anatomical variation.
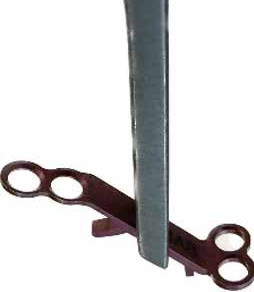 Holder Workflow
Plate side, color-coded size, secure capture in the holder groove, and insertion direction are organized so the surgeon and scrub team can share the same checks.
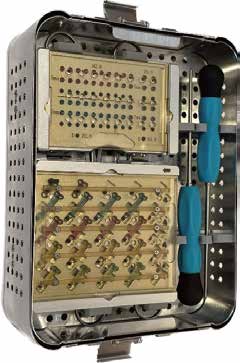 Compact Set
The driver, trials, holder, O-shaped holder, and implant case are presented as a compact set that is easy to handle in the operating room.
Operative Workflow
The sequence follows the order of checks used in the operating room, from preoperative planning through final confirmation before closure.
Confirm the responsible levels, opening range, open and hinge sides, plate size, screw length, and instrument set.
Check the open-side and hinge-side gutter position, bony resistance, and laminar support surface in sequence.
Confirm 6, 8, 10, and 12 mm sizes, color coding, bone contact, and screw-hole direction.
Hold the plate with the holder, create screw holes from the lateral-mass side, and place caudal screws first to preserve room for angle adjustment.
Confirm four-screw placement for each plate, plate lift-off, loosening, opening width, screw length, and instrument and implant counts.
Implant Line-up
The 6, 8, 10, and 12 mm plates are color coded, with screw lengths and rescue options listed together.
OR Workflow
Related publication
Two technical reports by Kentaro Yamane, Wataru Narita, and colleagues. The 2024 report compared early postoperative outcomes in 17 ExLAP and 11 conventional cases. The 2026 ExLAPPS report addresses laminoplasty with pedicle screw fixation for cervical OPLL.
References: ExLAP · 2024 / ExLAPPS · 2026
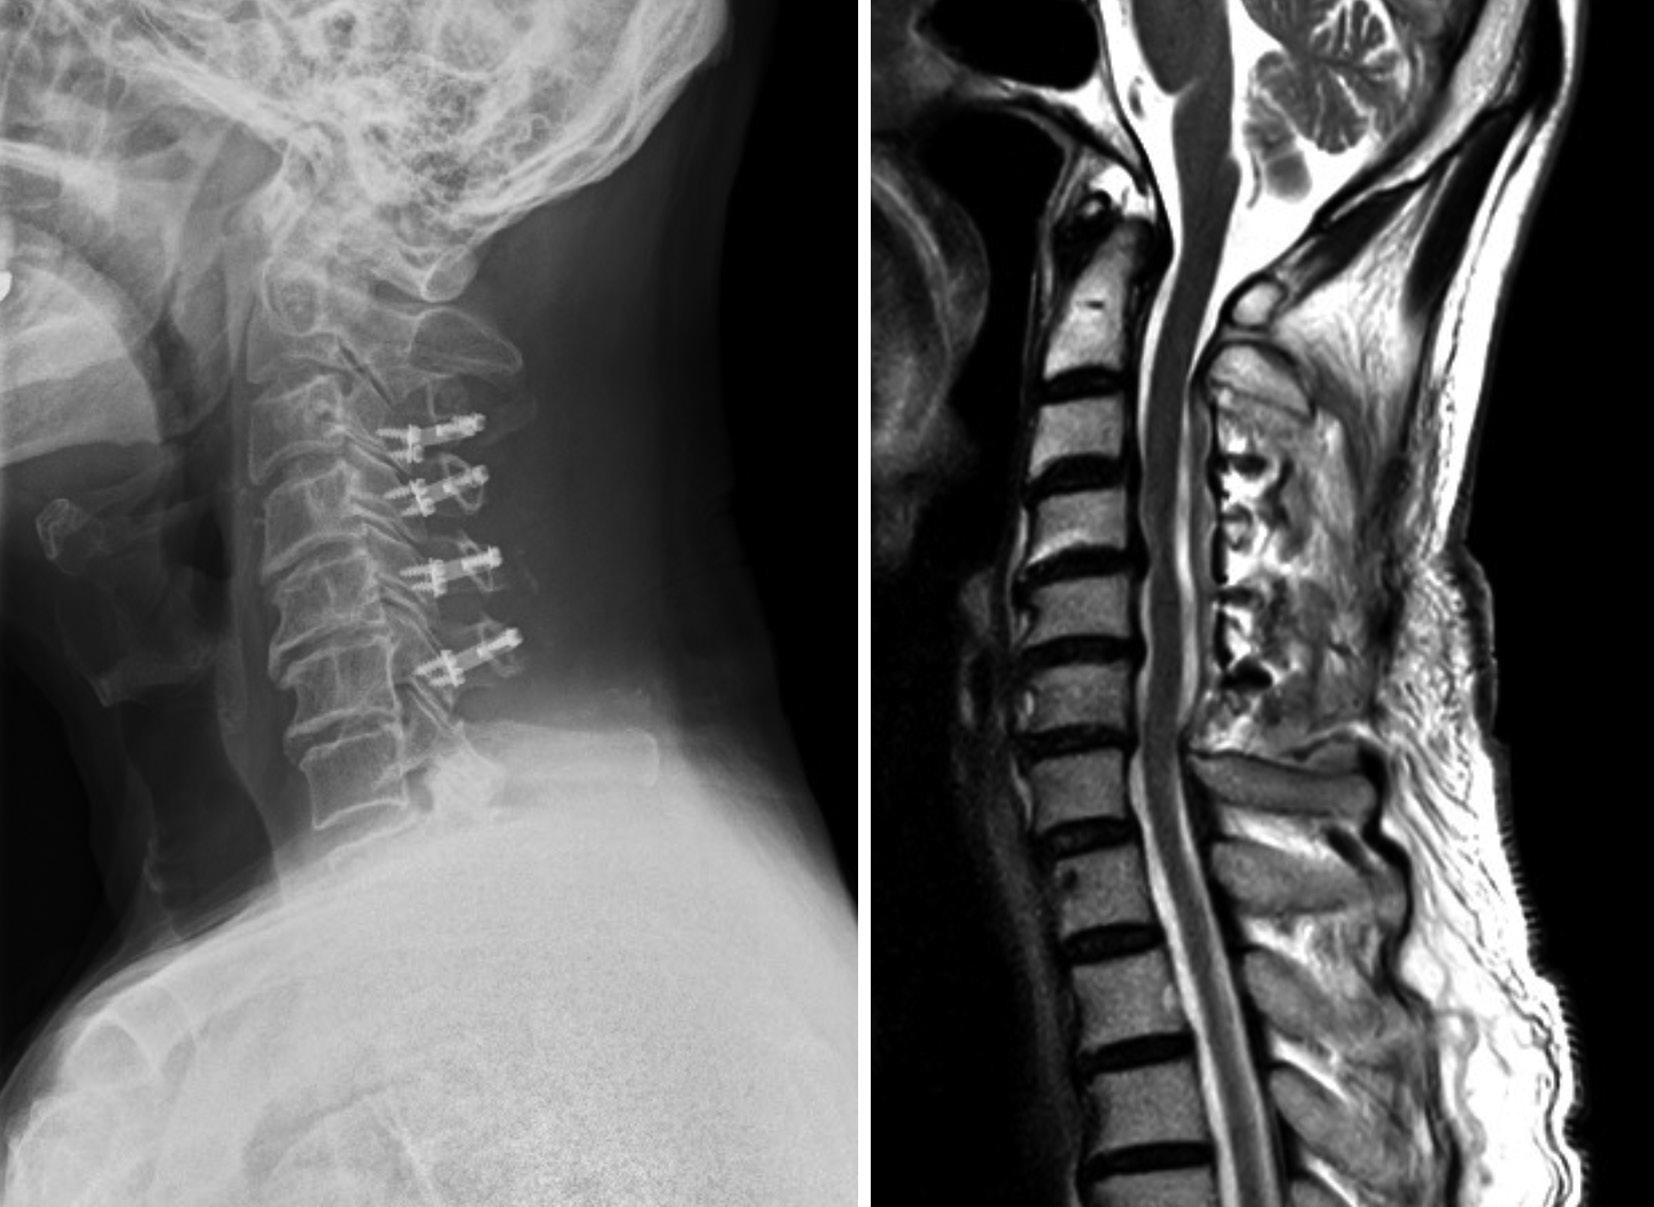
Patients with cervical spondylotic myelopathy treated from March to November 2023 were analyzed.
Reported in comparison with 11 conventional cases.
Technical note and preliminary acute postoperative outcome analysis.
Early experience with a pedicle screw-assisted procedure for cervical OPLL.
Both are preliminary reports of surgical techniques, not comparative trials of the OPERA device alone. They do not establish long-term outcomes or superiority over other devices.
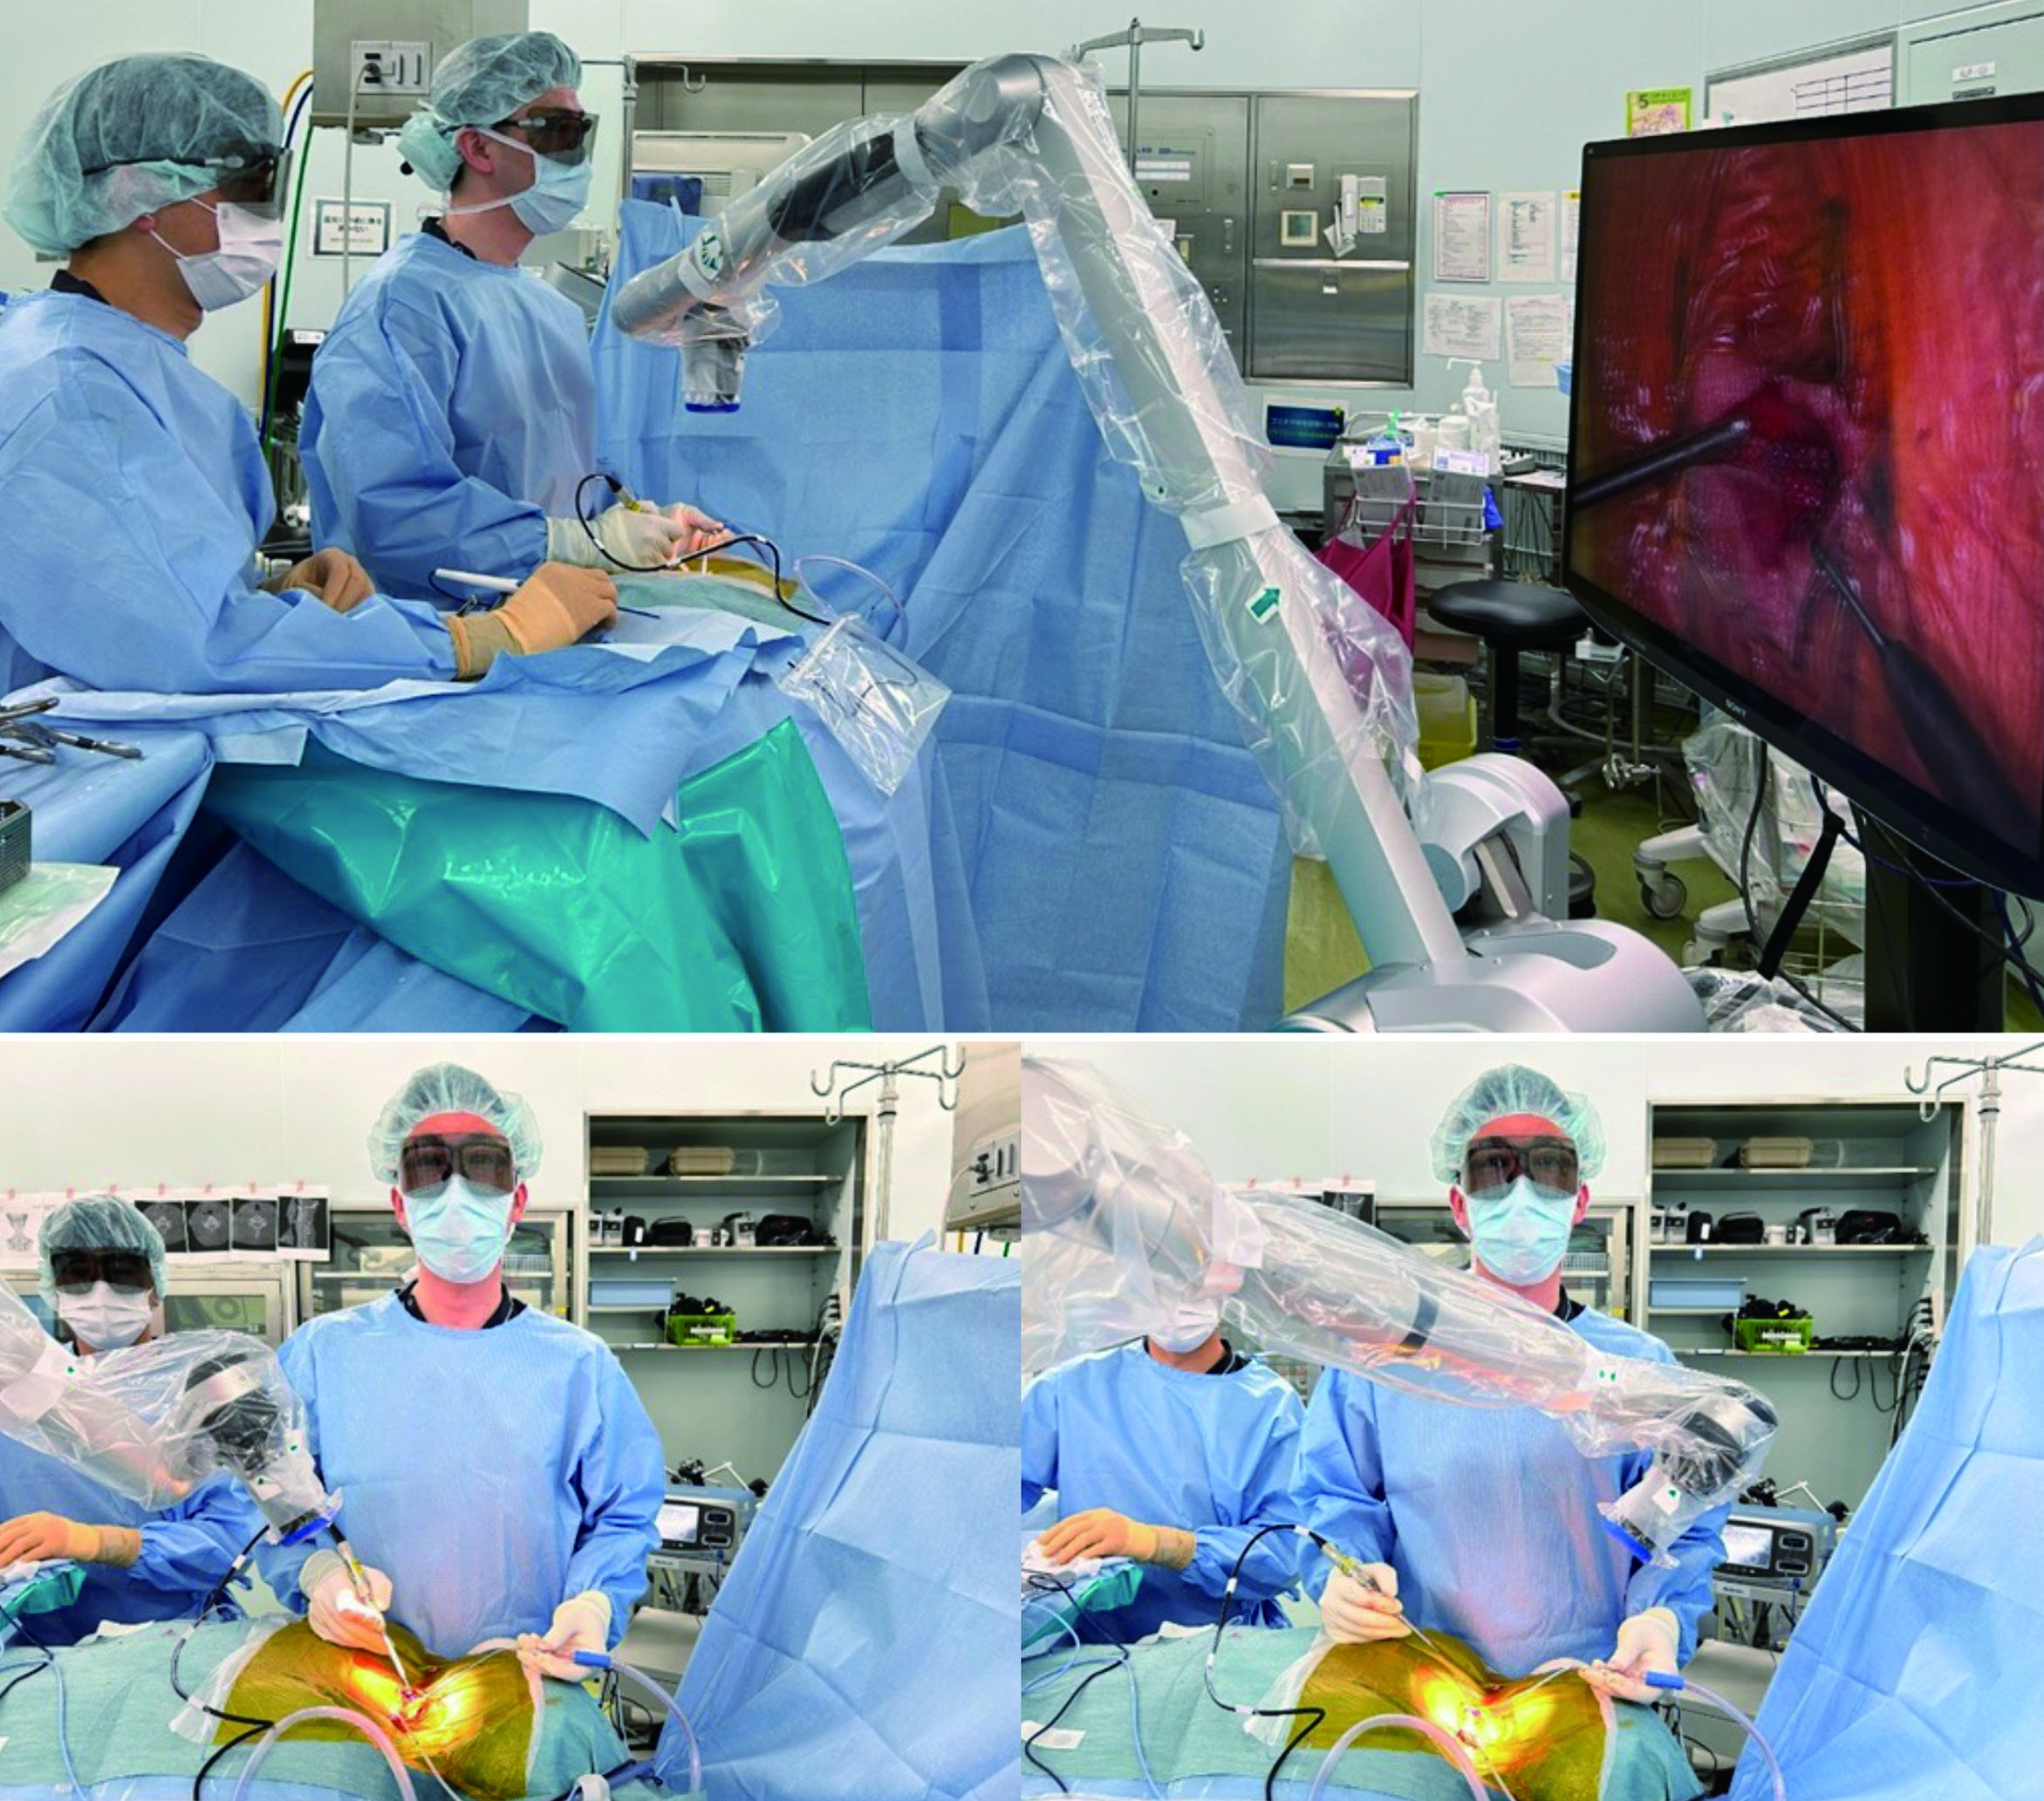
Surgical Atlas
Notes
This page describes the technique. Indication, choice of procedure, and risk explanation must be determined from clinical examination, imaging, and systemic condition.
The indication is the same as ordinary cervical laminoplasty for cervical spondylotic myelopathy and cervical ossification of the posterior longitudinal ligament. The authors previously required an incision of around 10 cm, but after shifting to ExLAP they use a 30-35 mm incision for C3-6 cases.
During the initial introduction, it is preferable to start with a larger incision and reduce the incision length according to the learning curve. When stenosis extends from C2/3 to C6/7, C3-6 laminoplasty combined with C2 or C7 domeplasty can address the lesion while completely preserving the semispinalis cervicis at C2 and C7.
Because the procedure is performed through a small incision while preserving soft tissue, the overall anatomy is difficult to grasp directly. Preoperative CT is used to confirm the thickness of each lamina, and 3D images are used to confirm spinous-process morphology and facet osteophytes so that the surgeon can plan spinous-process splitting and gutter creation in advance.
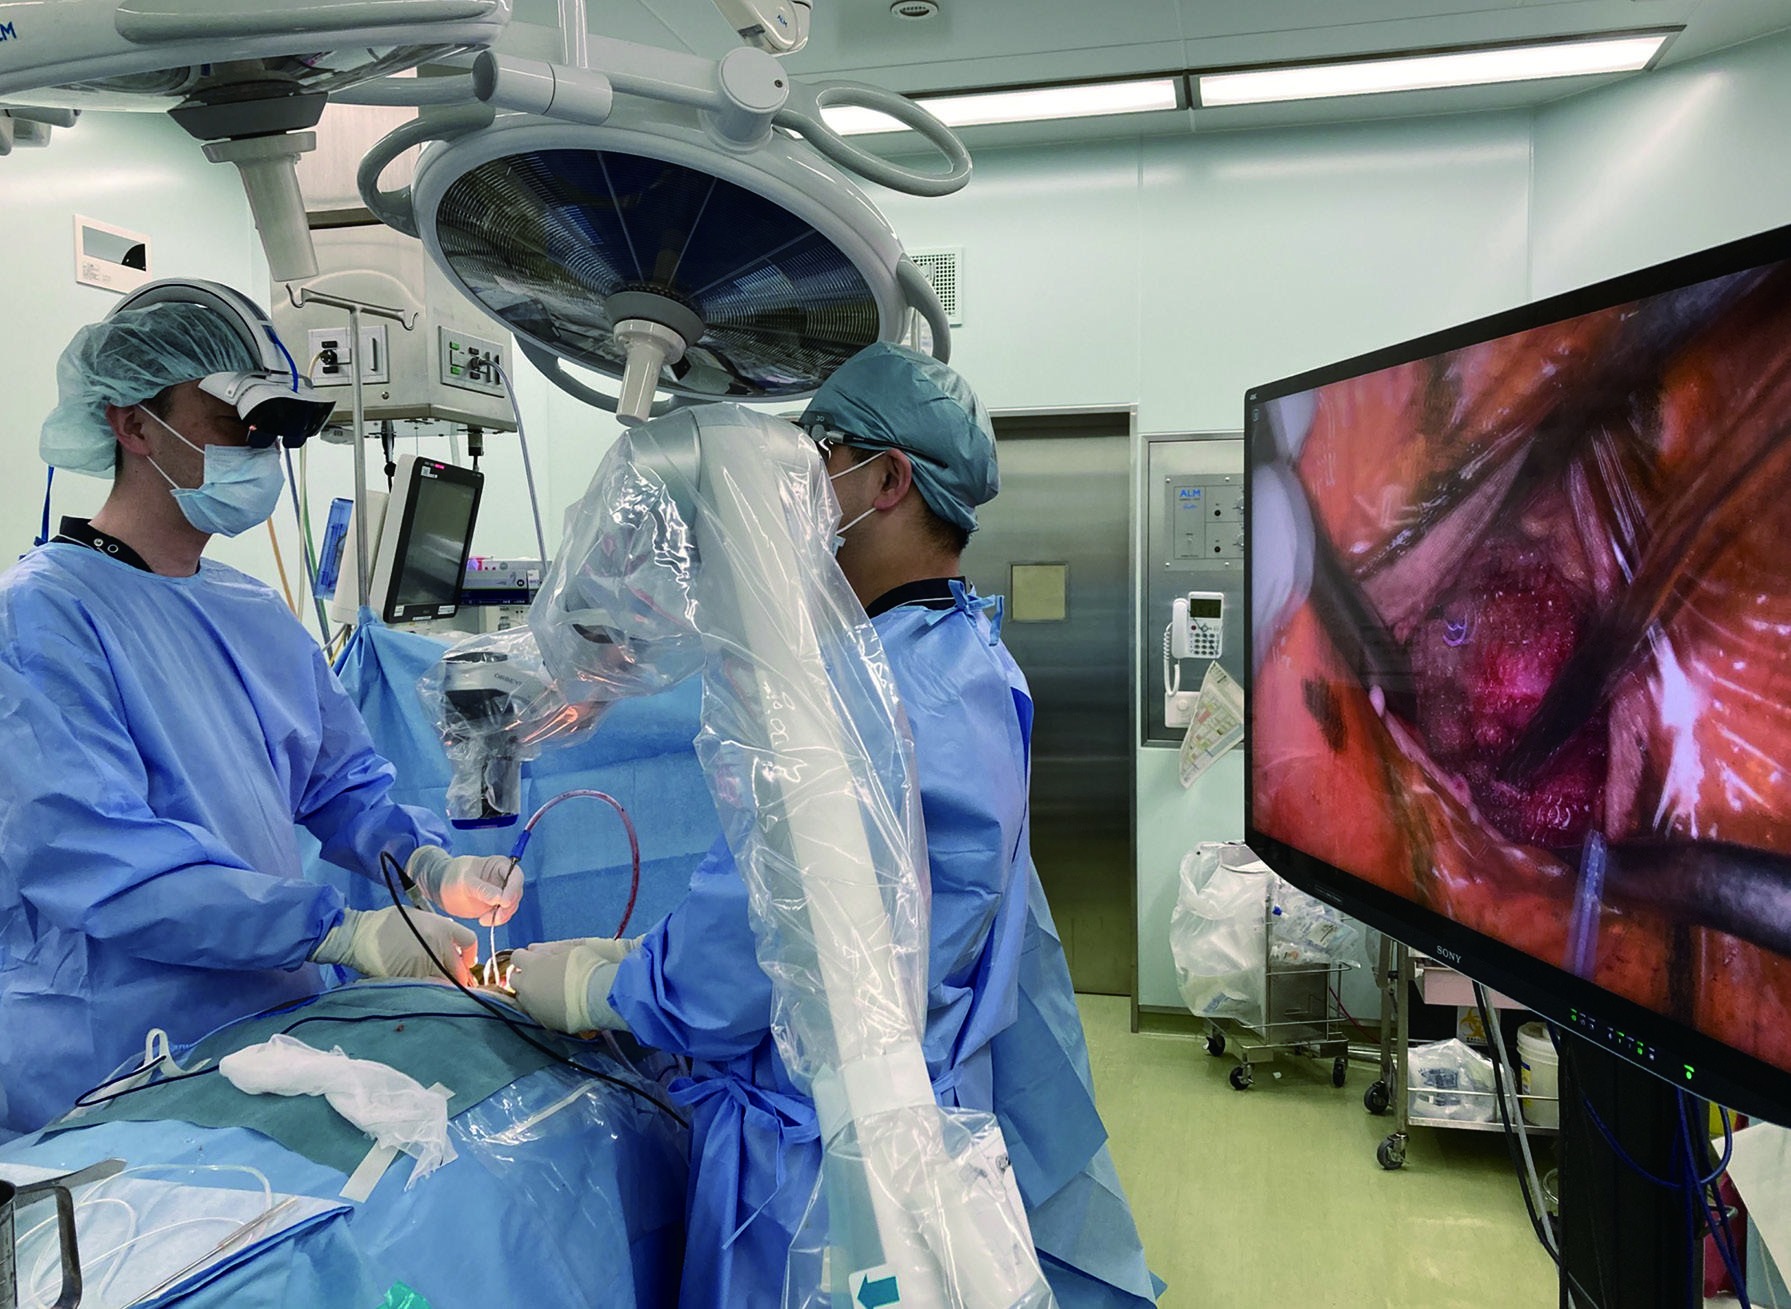
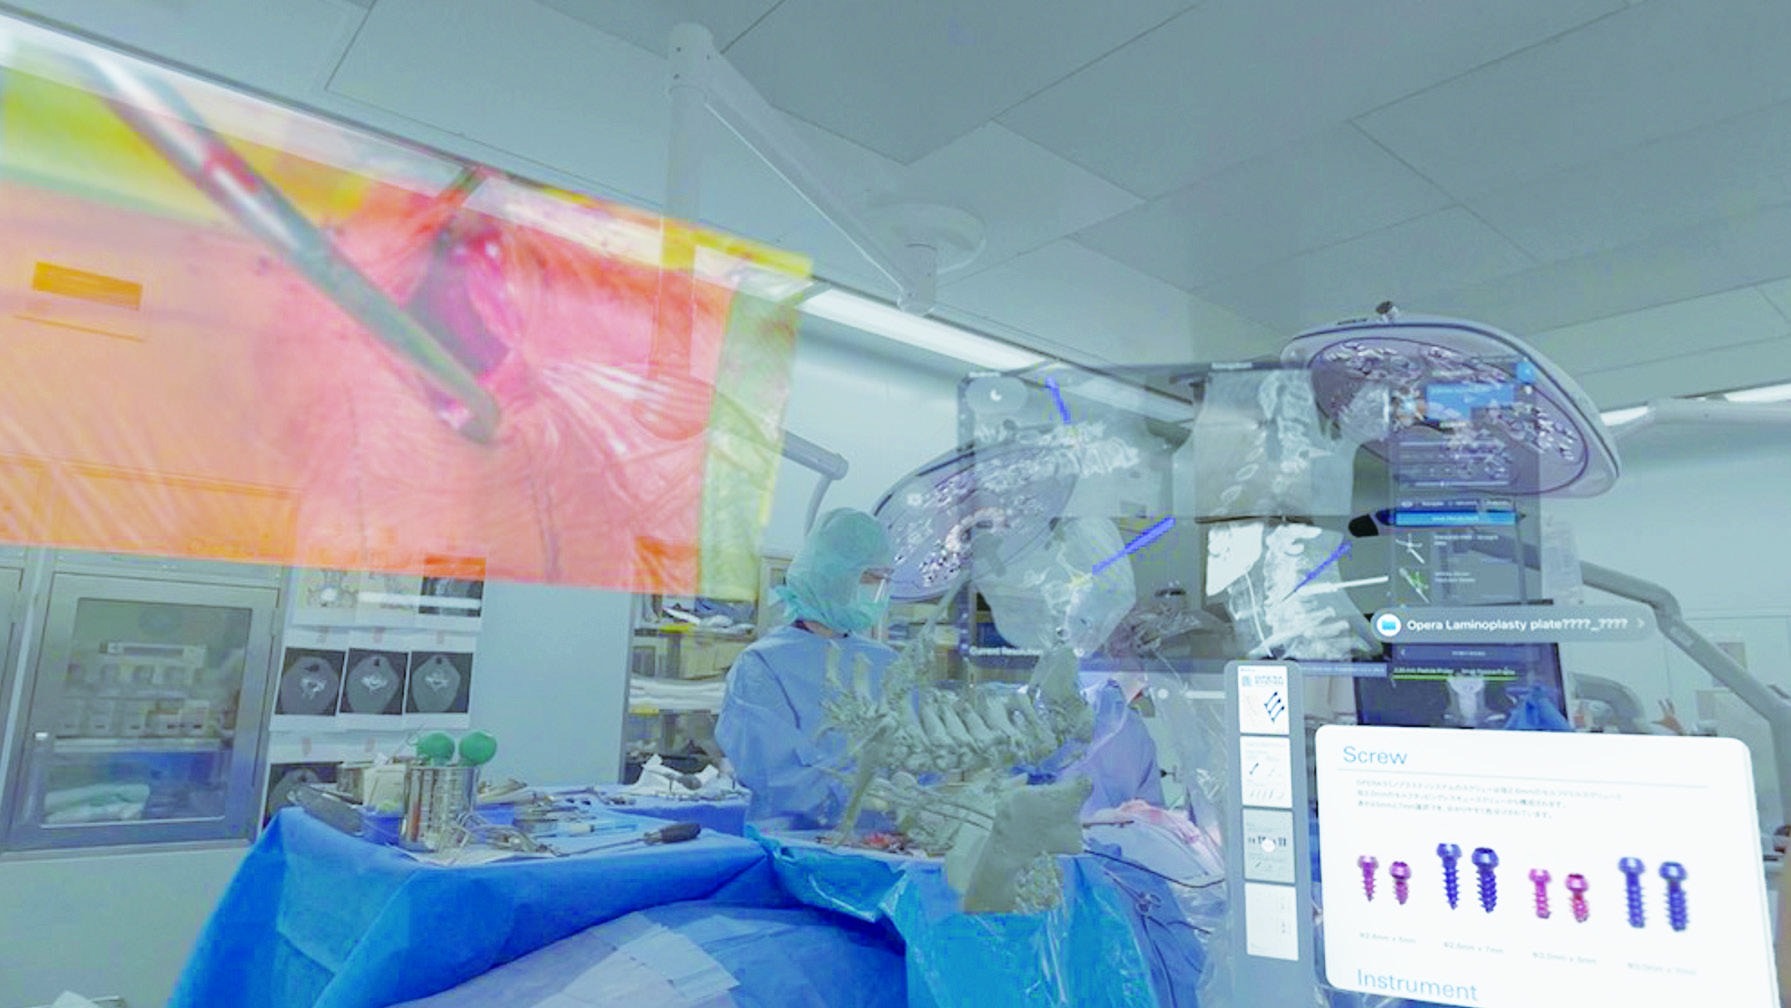
The authors use XR navigation as needed to understand cervical anatomy. For the procedure, they prepare a blunt right-angle Gelpi retractor, a compact high-speed burr, and a right-angle suction tube with appropriate strength and a non-sharp tip.
After carefully confirming alignment on a preoperative lateral radiograph, the head is fixed with a Mayfield skull clamp in a neutral to mildly flexed cervical position. Both shoulders are pulled downward with tape to make it easier to confirm the operative level.
Positioning is extremely important in small-incision surgery. In particular, when preoperative alignment is straight to kyphotic, ordinary positioning may create excessive kyphosis and make the operation difficult.
The surgeon stands on the patient's left side. The C2 and C7 spinous processes are palpated, and a two-fingerbreadth incision is designed. Usually, because the C3 lamina is prioritized, the incision is placed from the C3 spinous process toward the caudal side for two fingerbreadths. As a result, the incision is often placed approximately over the C3-5 spinous processes.
The midline over the nuchal ligament is accurately opened with electrocautery to reach the midline of the C3-6 spinous processes. At this point, the level is confirmed fluoroscopically. A blunt right-angle Gelpi retractor is then placed.
Using a 3 mm high-speed diamond burr, the tips of the C3-6 spinous processes are split from the midline to both sides while preserving the semispinalis cervicis attachment. The C3-6 laminae are exposed bilaterally with electrocautery. Exposure of the lateral masses is limited to the gutter position and kept as minimal as possible.
The semispinalis cervicis at C2 is completely preserved. The lower edge of the C2 lamina and the upper edge of the C3 lamina are exposed with a high-speed burr, and the C2/3 ligamentum flavum is exposed. If there is no stenosis at C2/3, the ligamentum flavum is detached from the C3 lamina using a curved curette from the upper edge of the C3 lamina.
If stenosis is present at C2/3, domeplasty of the lower edge of the C2 lamina is performed with a 3-4 mm high-speed burr until the ligamentum flavum can be detached, and the ligament is detached on the C2 laminar side. During C2/3 work, the exoscope camera is angled most cranially.
The gutters of the C3-5 laminae are created with a high-speed burr. The right side is used as the hinge side and the left side as the open side. On the open side, drilling is performed while cooling with saline as needed to avoid thermal injury. When the surgeon operates alone, a burr with a nozzle that drips saline is preferable.
For the C6 lamina, the gutter is created only on the hinge side, and the procedure then proceeds to the C6/7 interlaminar window. It is efficient to create the gutters with a continuous single-stroke concept.
At C6/7, the field is viewed downward toward the caudal side, so the lower edge of the C6 lamina obstructs the view and makes it difficult to reach the C6/7 ligamentum flavum. Removing a few millimeters of the distal C6 lamina with a high-speed burr makes the C6/7 ligamentum flavum easier to identify.
The upper edge of the C7 lamina is also exposed with a high-speed burr, and the ligamentum flavum is detached from the C7 lamina using a curved curette from the upper edge of C7. If stenosis is present at C6/7, the upper edge of the C7 lamina is removed as much as necessary with a high-speed burr or a 2 mm Kerrison rongeur.
After completing the C6/7 interlaminar window, the open side of the C6 lamina is cut. During C6/7 work, the exoscope camera is angled most caudally.
Because the visual field is limited in this technique, fixation with only sutures or fixation of an HA spacer with sutures or anchors is difficult. Various plate systems can be selected, but the author uses the OPERA SYSTEM from Symphony Medical Co. Ltd. because it is suited to minimally invasive techniques.
The plate has a very compact design that makes it easy to handle through a small incision. Because the screws achieve good purchase, the plate can be placed while preserving soft tissue. The laminar side of the plate can be bent easily so that it fits the shape and individual variation of the lamina.
Each lamina is lifted with a curved curette, and the plate is placed. The ligamentum flavum on the open side is generally not cut before lifting the lamina. If lamina elevation feels stiff, the hinge-side gutter is deepened, and it is important not to force the lamina upward.
Each screw hole is created with a 1-2 mm high-speed burr. The plate is fixed with two screws on the lateral-mass side and two screws on the laminar side. In small-incision surgery, postoperative activity tends to be high, and because the posterior cervical muscles are fully preserved, pressure from soft tissue can make reclosure of the opened lamina more likely.
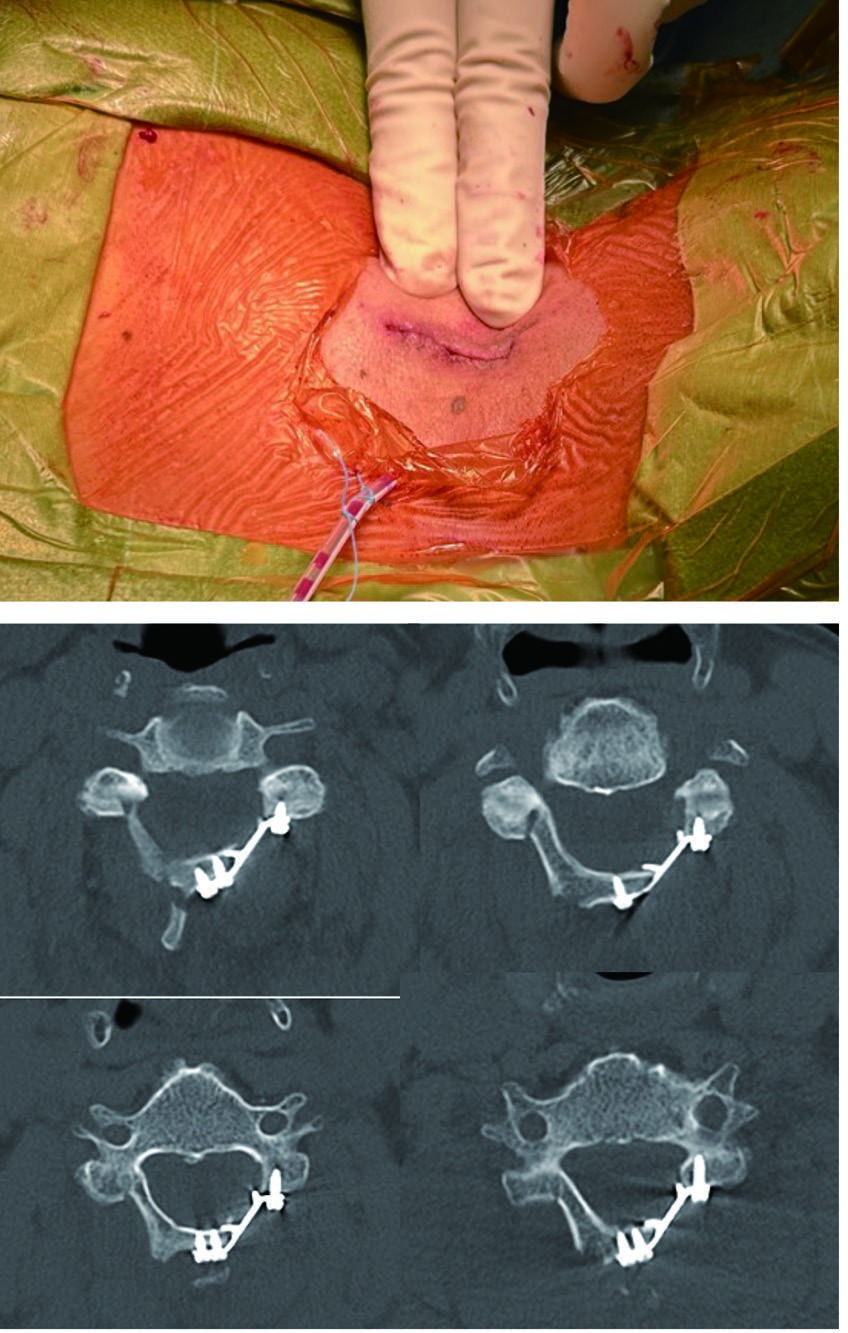
After thorough irrigation, a 3.5 mm closed continuous suction drain is placed and the muscle layer is sutured. By having an assistant or scrub nurse retract the Gelpi retractor, the cranial and caudal ends of the muscle layer can be sutured under direct vision even through a small incision.
Because the author performs the operation alone, STRATAFIX, which allows tight continuous suturing, is used frequently. Subcutaneous suturing is performed, and Steri-Strips are applied at the end. In the authors' department, rehabilitation begins the day after surgery and early mobilization is started.
Because exoscope images are first converted into digital data, a new interface combining the exoscope with support devices such as XR is expected. CT navigation images can be displayed on the exoscope monitor as picture-in-picture.
By projecting the exoscope's 3D monitor image onto smart glasses, the operative field and the 3D image on the glasses can be checked with minimal eye movement, and the monitor installation space can be reduced. At present, however, smart glasses have lower resolution than flat monitors and are heavy, so issues remain for clinical use.
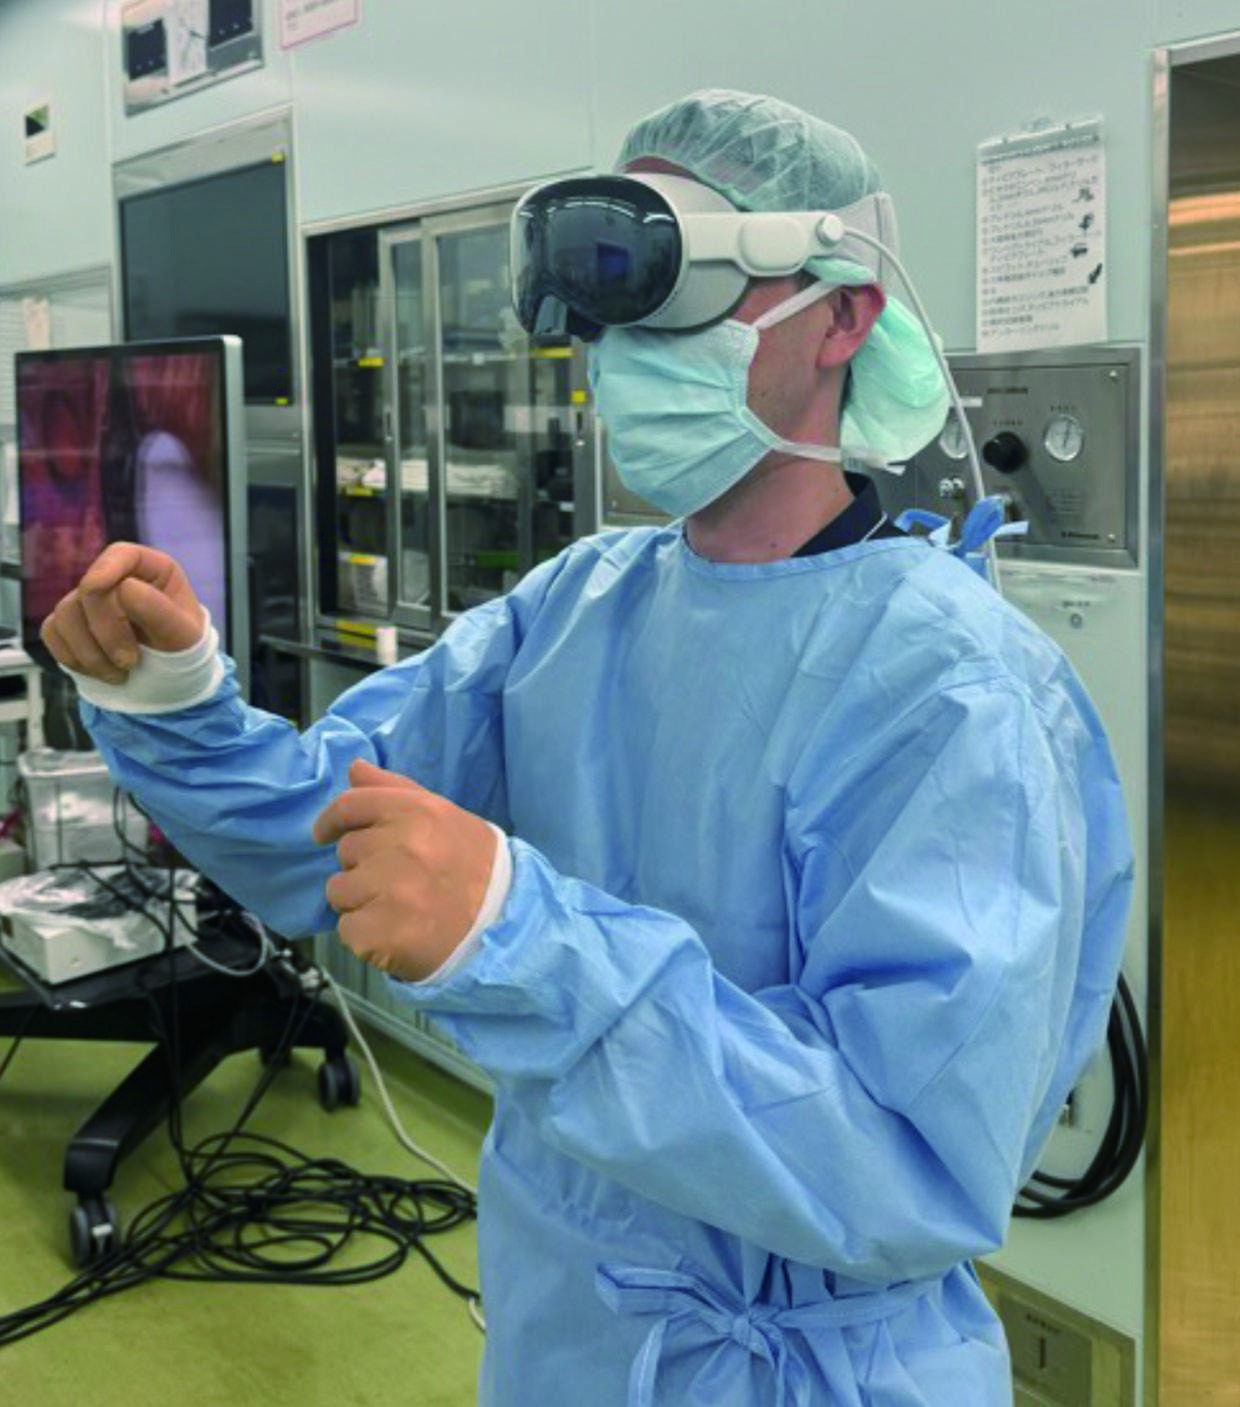
A head-mounted display is a wearable display with pass-through capability, and when linked with an exoscope it is expected to be useful in magnified-view surgery. For education, including surgical training and remote operative support or observation, practical use is possible if the internet environment is available.
Technical Notes
Positioning is extremely important in small-incision surgery. When preoperative alignment is straight to kyphotic, ordinary positioning can create excessive kyphosis and make the procedure difficult.
The C3 lamina and lateral mass are often the deepest part of the field and slope cranially, which makes plate placement more difficult. The incision is therefore set closer to the C3 lamina to make C3 plate placement easier.
Bleeding can be reduced by avoiding complete resection of the interlaminar ligamentum flavum and instead cutting or partially detaching it with a curette. In many cases, bipolar coagulation is unnecessary.
The C6/7 window is created before cutting the open side of the C6 lamina because cutting C6 first may allow the lamina to move in the closing direction during C6/7 work and potentially compress the spinal cord.
Clinical Questions
No. The 30–35 mm incision described for C3–6 is a guide from the illustrated technique, not a universal requirement. Preoperative imaging, stenosis extent, alignment, bone anatomy, required exposure, and surgical experience guide the decision. Adequate exposure takes priority over incision length.
Review indications and planningThe laminar side of the plate can be bent to fit individual laminar anatomy. Dedicated drivers, trials, and holders also form a compact instrument set. Confirm indications, sizing, and handling against the applicable instructions for use and official technique manual before clinical use.
Review plates and instrumentsExLAP is the published term for exoscopic minimally invasive open-door laminoplasty. ExLAPPS adds pedicle screw fixation, with initial experience for cervical OPLL reported in 2026. It does not simply mean inserting screws for a laminoplasty plate.
See the ExLAPPS referenceClinical reports of a procedure must be distinguished from evaluation of a device alone. The two preliminary reports do not establish OPERA device superiority over other products or guarantee earlier recovery for every patient.
Review study scope and limitationsSources
Organized from OS NEXUS No.18, related publications, and OPERA SYSTEM materials.